In a previous post, we saw how to create a free hosted PostgreSQL DB on Heroku. In this one, we will see how to add the created DB to pgAdmin. It is assumed that you have pgAdmin installed and set up in your machine. If not, please download it from here. At the time of writing this post, pgAdmin 4 is the latest version of pgAdmin.
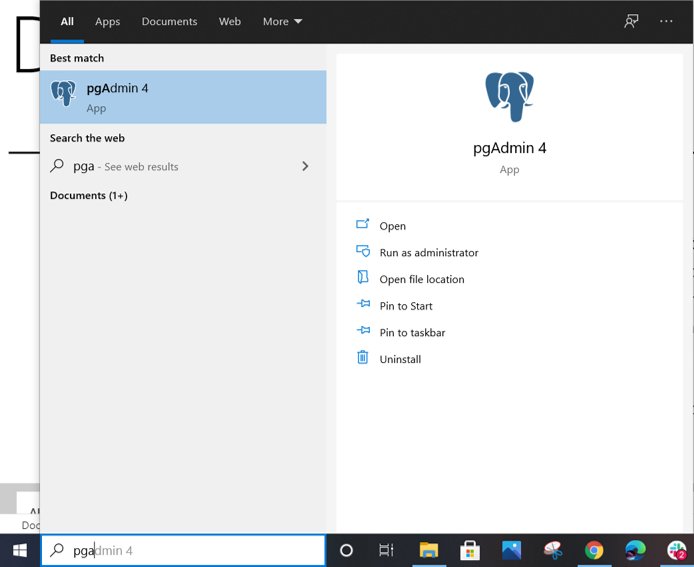
Now, open pgAdmin (you can search for pgAdmin in the start menu in Windows). It should open in a new browser tab.
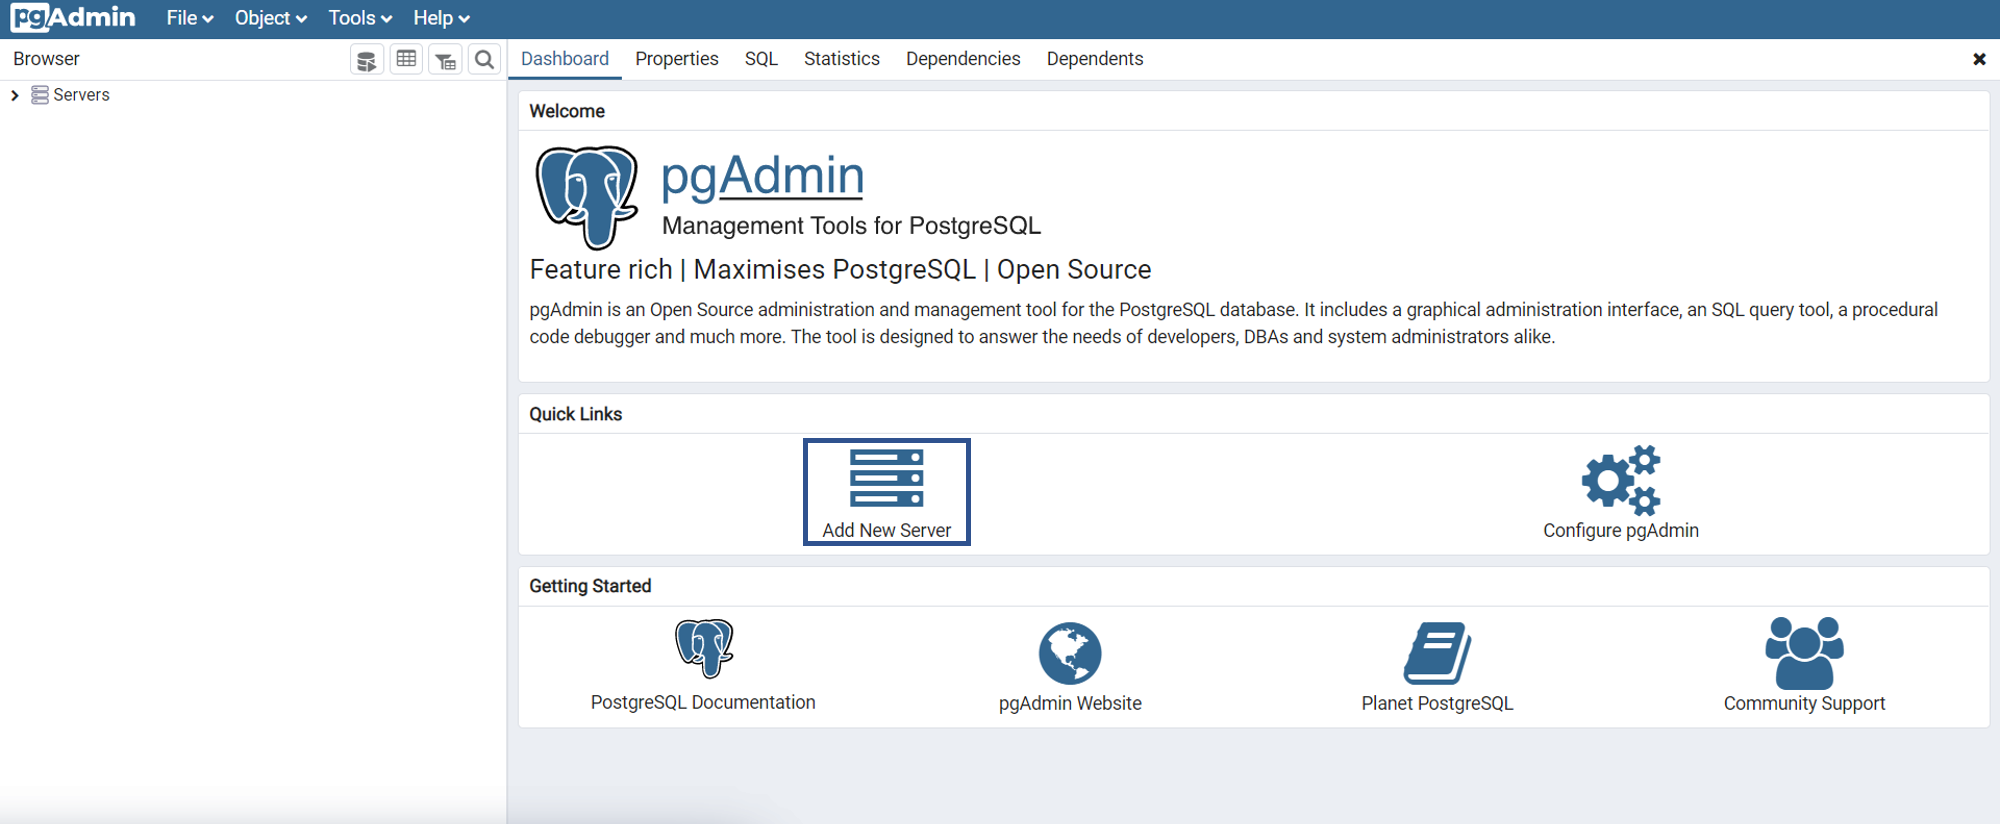
Enter your password, and then click on the ‘Dashboard’ tab. You will see the ‘Add New Server’ option, as you can see in the image below.
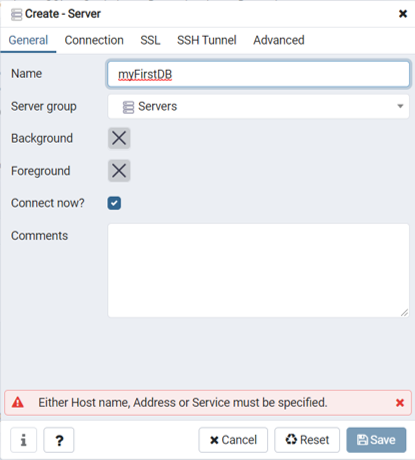
Click on that option. A dialog box will open up. Provide a suitable name for the server in the ‘General’ Tab. This can be any name you can think of. I’m going to name this ‘myFirstDB’.
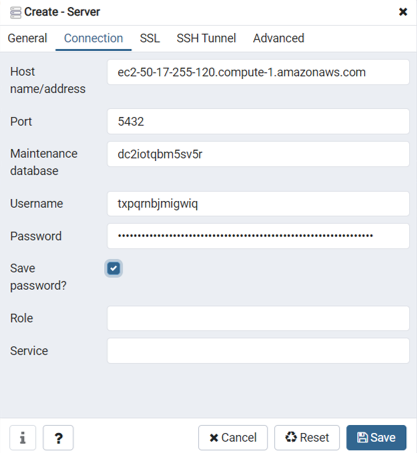
Now move on to the ‘Connection’ Tab, and enter the connection details, that you obtained from Heroku. Enter the database name in the ‘Maintenance DB’ field, the Host, Username, and Password in the respective fields. The port will be 5432, as you can verify from the Heroku credentials.
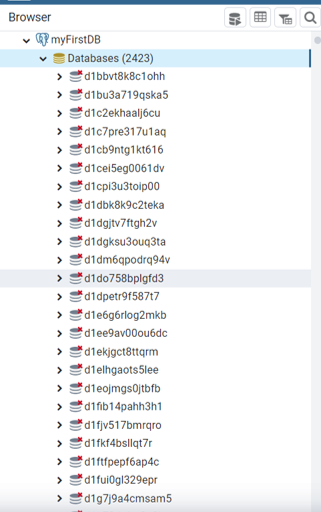
You can leave Role and Service blank. Ideally, you could click on ‘Save’ after this step, but this will lead to way too many DBs being displayed in this server (as you can see in the image below).
In order to avoid this, go to the Advanced Tab, and enter the DB name in the DB restrictions field. This is the same value that you entered in the ‘Maintenance DB’ field in the ‘Connection’ tab.
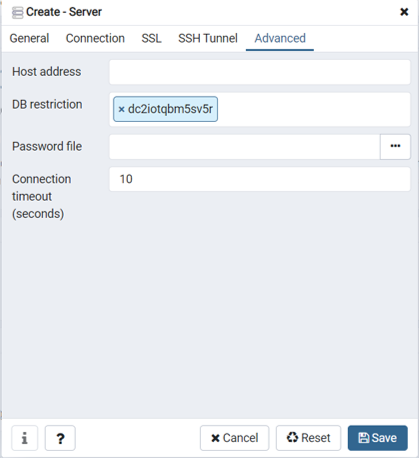
You can leave the SSL and SSH Tunnel tabs to their default values. Now when you click on ‘Save’, you will only see your DB and not thousands of others as was the case earlier. Click on the DB and have a look at the dropdown that opens up.
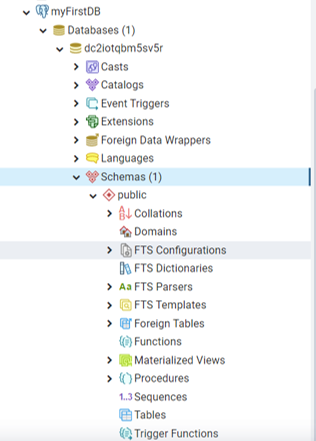
Click on Schemas, and then click on the Query Tool icon at the top. This icon will open up a new text editor window wherein you can write SQL queries.

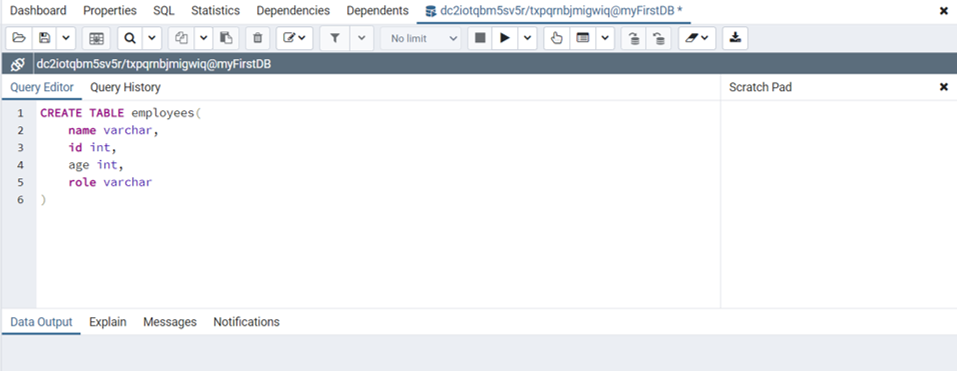
In order to run the query, click on the ‘Play’ icon at the top. Now go ahead and SQL your way into your Postgres journey. All the best!
Found this post helpful? Then check out further posts on iotespresso.com. Also, follow IoT Espresso on Twitter to get notified about every new post.
1 comment