Introduction
In the Create Captive Portal with ESP32 article, we saw an example of how to create a captive portal with ESP32, using the AsyncWebServer library. In that tutorial, we had kept the HTML file hard coded into the Arduino code. However, in cases where you have an extensive HTML file, you’d want to store it elsewhere as a file, and not hardcode the contents in the code, otherwise the code would become very bulky.
You could utilize the SPIFFS storage of ESP32. For those who aren’t aware of SPIFFS, you can think of it as a mini-SD Card onboard the ESP32. ESP32 comes with a default SPIFFS storage of 1.5 MB. You can increase or decrease this size (see How to set partitions in ESP32). This default 1.5 MB storage is large enough to store sufficiently HTML files, and remove the burden of HTML from the Arduino code.
In this tutorial, we will copy the HTML content from the Create Captive Portal with ESP32 tutorial in a separate .html file, store the file in SPIFFS, and then use that file when displaying the web page in the captive portal.
Prerequisites
It is strongly recommended that you go through the Create Captive Portal with ESP32 tutorial before starting this one. In this tutorial, no further explanation is provided for the concepts already covered there.
Apart from this, you will need to download and install the ESP32 File System Uploader tool for the Arduino IDE, to upload the HTML file to SPIFFS. The steps for doing that are given below.
ESP32 File System Uploader Download and Install
This uploader is like a plugin for Arduino IDE. It is developed by me-no-dev, the same developer who developed the AsyncWebServer library that we are using for the Captive Portal.
The uploader can be found here: https://github.com/me-no-dev/arduino-esp32fs-plugin/releases/
Follow these steps to install this uploader:
- Download the latest zip (ESP2FS-1.0.zip at the time of writing this tutorial)
- Locate the tools directory of your Arduino. In Windows, the path is generally C:\Program Files (x86)\Arduino\tools
- Unzip this zip file in the tools folder.
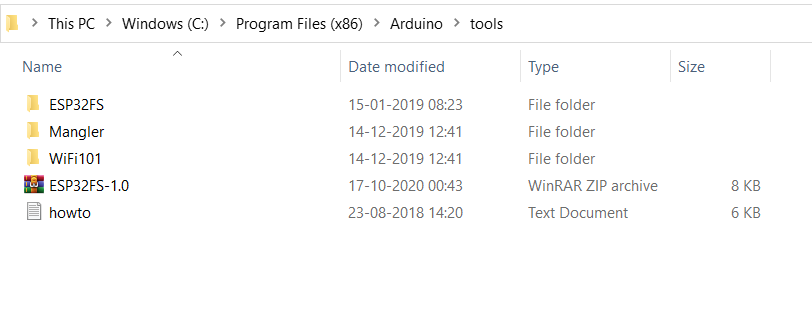
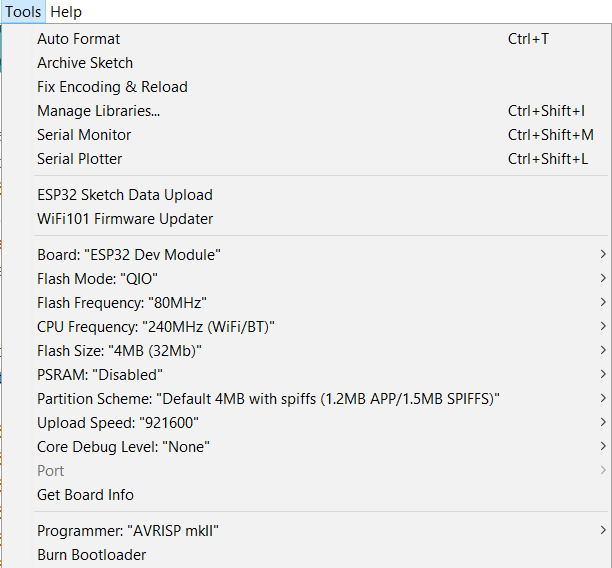
You will be able to see the ESP32FS folder in the tools folder. Now, you can restart your Arduino IDE. You should be able to see ‘ESP32 Sketch Data Upload’ in the Tools menu of Arduino IDE.
We will use this tool to upload the HTML file to the SPIFFS of ESP32.
Code Walkthrough
The code can be found on GitHub here: https://github.com/yash-sanghvi/ESP32/tree/master/Captive_Portal_SPIFFS_HTML
If you notice, there is a data folder in the sketch folder, which contains the HTML file. This HTML file contains the same HTML snippet that we had hardcoded in the Captive Portal tutorial.
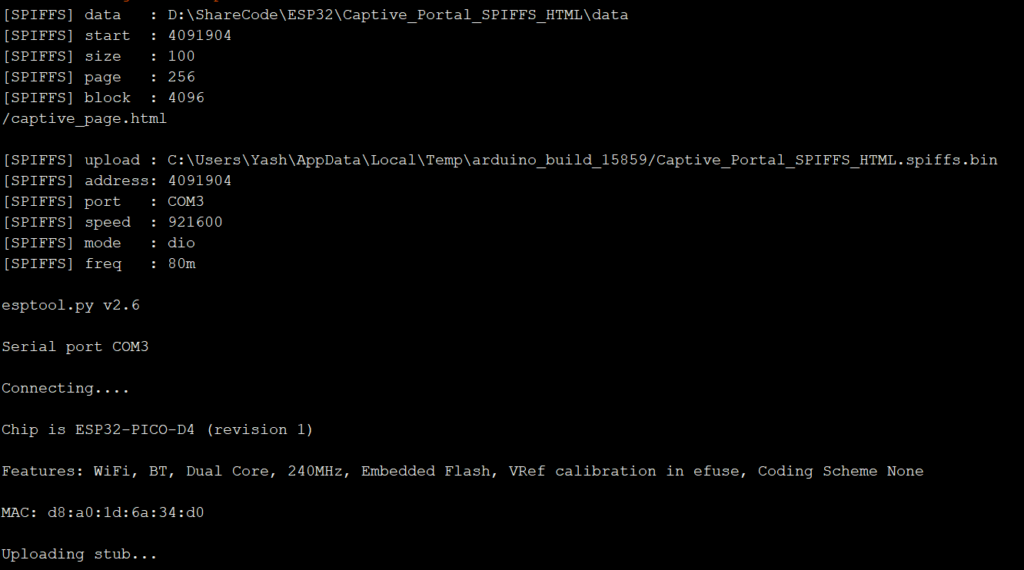
The ‘ESP32 Sketch Data Upload’ tool that we installed just now, uploads everything in the data folder to the SPIFFS. If you click on that tool, you will see messages like in the image below in the Output window
Once the upload is complete, the HTML file will be present in your SPIFFS. You can then go ahead and upload the .ino sketch using the normal upload process.
Because the Arduino code is more or less similar to the code in the Create Captive Portal with ESP32 tutorial, we will just look at the differences.
Library Inclusion
We add the SPIFFS and the FS libraries in addition to the other libraries.
#include "FS.h"
#include "SPIFFS.h"
listDir() function
While this is not required for the Captive Portal to work, this function has just been added for us to verify that the ‘ESP32 Sketch Data Upload’ tool worked, and that our HTML file is indeed within the SPIFFS.
void listDir(fs::FS &fs, const char * dirname, uint8_t levels){
   Serial.printf("Listing directory: %s\r\n", dirname);

   File root = fs.open(dirname);
   if(!root){
      Serial.println("− failed to open directory");
      return;
   }
   if(!root.isDirectory()){
      Serial.println(" − not a directory");
      return;
   }

   File file = root.openNextFile();
   while(file){
      if(file.isDirectory()){
         Serial.print("  DIR : ");
         Serial.println(file.name());
         if(levels){
            listDir(fs, file.name(), levels -1);
         }
      } else {
         Serial.print("  FILE: ");
         Serial.print(file.name());
         Serial.print("\tSIZE: ");
         Serial.println(file.size());
      }
      file = root.openNextFile();
   }
}
This function is invoked in the setup().
//List contents of SPIFFS
listDir(SPIFFS, "/", 0);
Here, SPIFFS is the file system, “/” specifies that we want to look at the root directory of SPIFFS, and 0 specifies that we don’t want to go further down the levels (i.e., we don’t want nested listing).
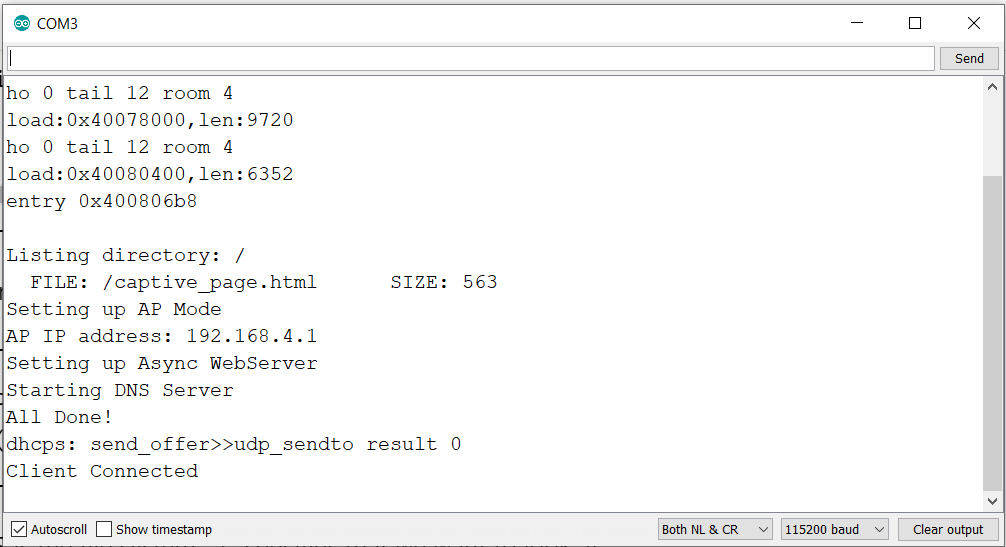
The Serial Monitor output will show this listing.
SPIFFS.begin()
This is another step added in the setup. We need to initialize the SPIFFS.
if(!SPIFFS.begin(true)){
    Serial.println("An Error has occurred while mounting SPIFFS");
    return;
  }
The ‘true’ in the SPIFFS.begin() specifies that the SPIFFS should be formatted if the mounting fails.
request->send
This is perhaps the most important change in the code. In the previous captive portal code, we used the following line for displaying our HTML page:
request->send_P(200, "text/html", index_html);Over here, we use:
request->send(SPIFFS, "/captive_page.html","text/html", false);Why this change? If you go to the source code of the AsyncWebServerLibrary, you will see the following options for the send function.
    void send(AsyncWebServerResponse *response);
    void send(int code, const String& contentType=String(), const String& content=String());
    void send(FS &fs, const String& path, const String& contentType=String(), bool download=false, AwsTemplateProcessor callback=nullptr);
    void send(File content, const String& path, const String& contentType=String(), bool download=false, AwsTemplateProcessor callback=nullptr);
    void send(Stream &stream, const String& contentType, size_t len, AwsTemplateProcessor callback=nullptr);
    void send(const String& contentType, size_t len, AwsResponseFiller callback, AwsTemplateProcessor templateCallback=nullptr);
    void sendChunked(const String& contentType, AwsResponseFiller callback, AwsTemplateProcessor templateCallback=nullptr);
    void send_P(int code, const String& contentType, const uint8_t * content, size_t len, AwsTemplateProcessor callback=nullptr);
    void send_P(int code, const String& contentType, PGM_P content, AwsTemplateProcessor callback=nullptr);
Since we want to fetch our HTML page from a file system, we are using the highlighted option.
In case you wish to display a dynamic web page, you can add placeholders in the HTML, and add a processor function, as described in Display dynamic webpages with ESP32.
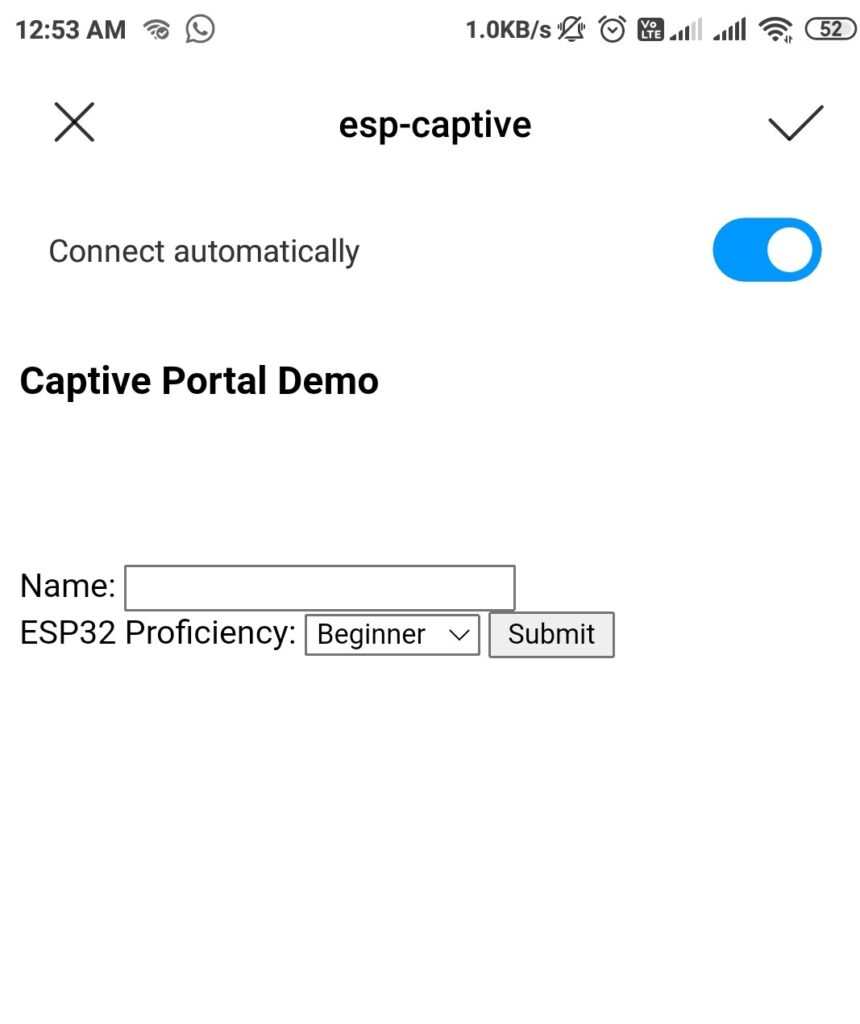
That’s it. These are the code changes required for making the Captive Portal work with an HTML page stored in SPIFFS. You can connect your mobile or PC to your ESP32, and the captive portal will immediately pop up.
I hope you enjoyed this tutorial. For more tutorials on ESP32, checkout https://iotespresso.com/category/esp32/
Since you are here, you may find this course on Udemy, which explains how to link ESP32 with AWS IoT, to be quite interesting. Do check it out.
When I attempt to setup the processor for this one, it has me download the file instead of displaying it.
This is the code:
server.on(“/”, HTTP_GET, [](AsyncWebServerRequest *request){
request->send(SPIFFS, “/captive_page.html”,”text/html”, processor);
Serial.println(“Client Connected”);
});
When processor is changed back to false, the page arrives as normal once more.
Hi Ty Roden,
If you look at the function declaration,
void send(FS &fs, const String& path, const String& contentType=String(), bool download=false, AwsTemplateProcessor callback=nullptr);you will notice that the ‘false’ argument was for the bool download. If you wish to add the Processor, you will need to add it to the callback argument. Your code, therefore, will be
server.on(“/”, HTTP_GET, [](AsyncWebServerRequest *request){request->send(SPIFFS, “/captive_page.html”,”text/html”, false, processor);
Great job !