Introduction
While this article is more or less standalone, it can be viewed as the next step to the How to connect ESP32 to AWS IoT Core article. In that article, we made the ESP32 send messages to the ‘esp32/pub’ topic on AWS IoT Core. In this article, we will see how to take an action based on the received messages. Just to recap, a sample message sent from ESP32 to the ‘esp32/pub’ topic looked like:
{
  "elapsed_time": 52000,
  "value": 566
}
In this article, let’s define a rule to trigger a lambda whenever the magnitude of ‘value’ crosses 800.
Prerequisites
You will require a topic created on AWS IoT Core. It is assumed that you are well familiar with Lambda functions and that you have basic understanding of SQL statements.
Creating the Rule
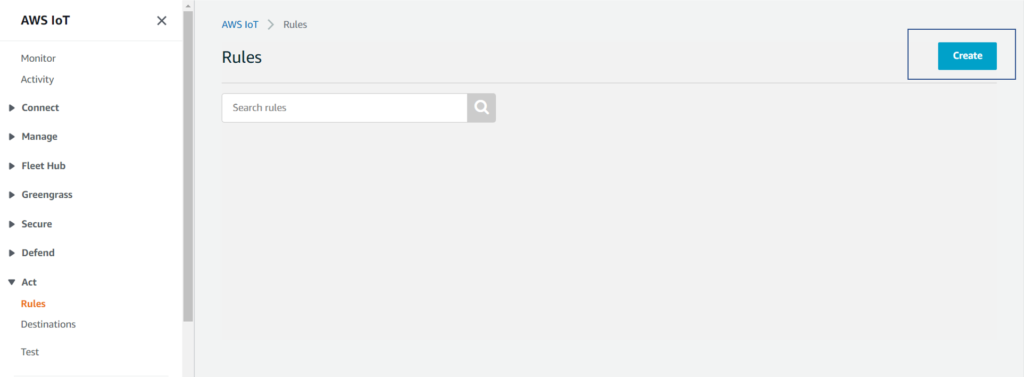
Go to the AWS IoT Core Console, and from the left menu, click on the ‘Act’ dropdown, and click on ‘Rules’. On the screen that opens up, click on ‘Create’.
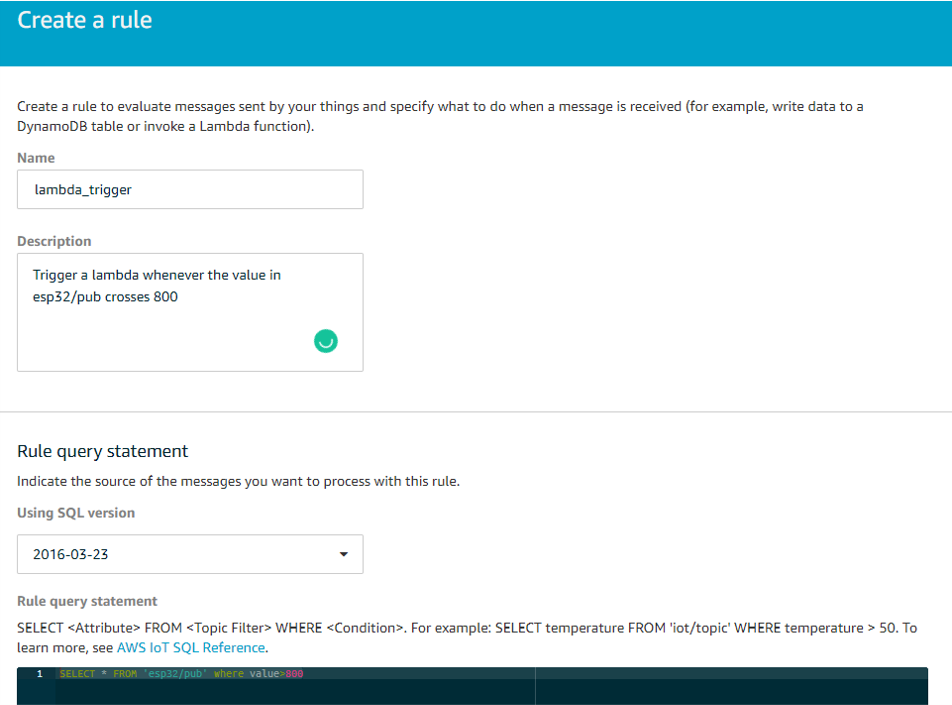
Give your rule a suitable name and description. Leave the SQL version to the default value, and for the rule query statement, add the following:
SELECT * FROM 'esp32/pub' where value>800You can change the topic name and the WHERE condition if you are using a different topic.
Note that the SQL query statement is used to filter out messages that should generate a trigger. The above statement, for example, will trigger the action only when the value in an incoming message is above 800. You can find the AWS IoT SQL reference here.
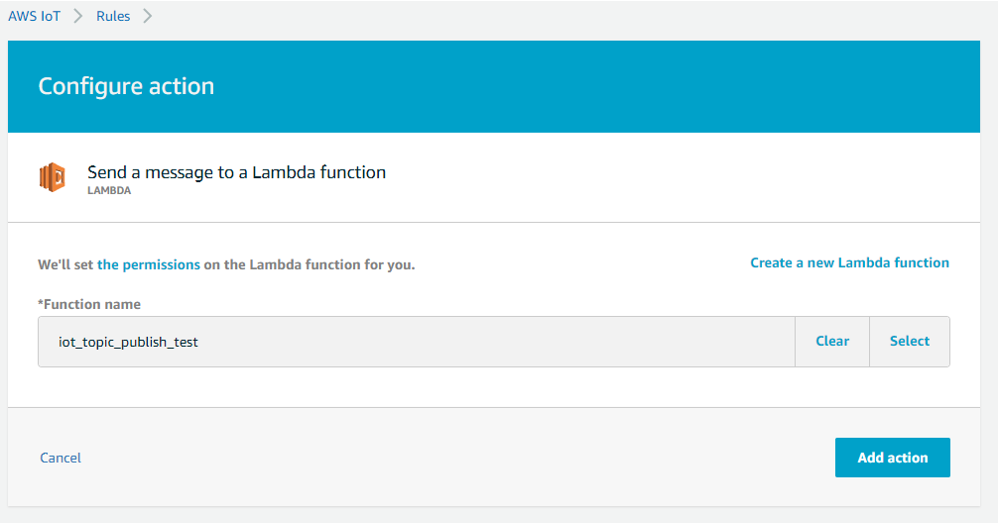
Next, click on ‘Add action’. Out of the list of actions that opens up, select ‘Send a message to a Lambda function’, and then click on ‘Configure action’. As you can see, there are several other actions possible. You are encouraged to explore them.
You will then need to select the lambda function. We will use the lambda function created in the Publishing from Lambda to an AWS IoT Topic article. You can use any other lambda function. If you are yet to create a lambda function, refer to the above article and follow the steps. The lambda function created in that article posts a message to the ‘esp32/sub’ topic on invocation.
The message sent to the lambda function goes into the ‘event’ argument. You can print the event at the beginning of the function to verify that.
Once you have selected the lambda, click on ‘Add action’. You can set optional ‘Error action’ and optional ‘Tags’. We’ll skip them for now. Click on ‘Create rule’.
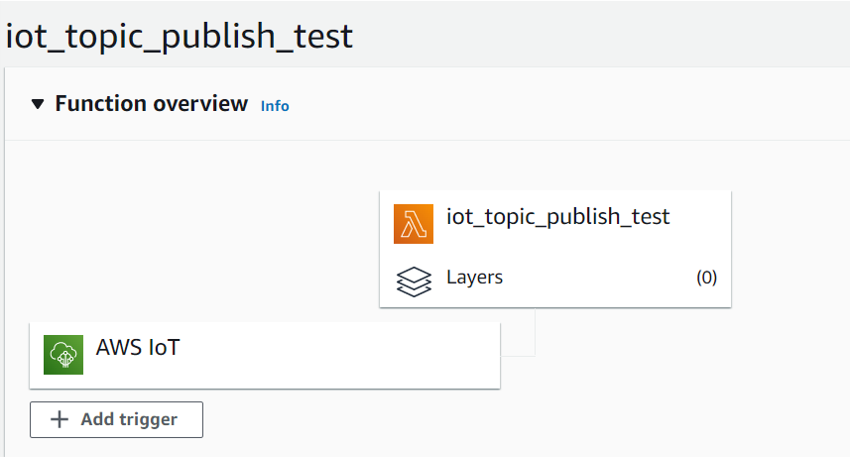
Your rule is now created. If you navigate to the lambda function, you should see a trigger from AWS IoT.
Testing the Rule
In order to test the rule, you can connect your device (ESP32 or any other), and actually send messages to ‘esp32/pub’ topic, and check the lambda invocation to see if the rule executes as expected.
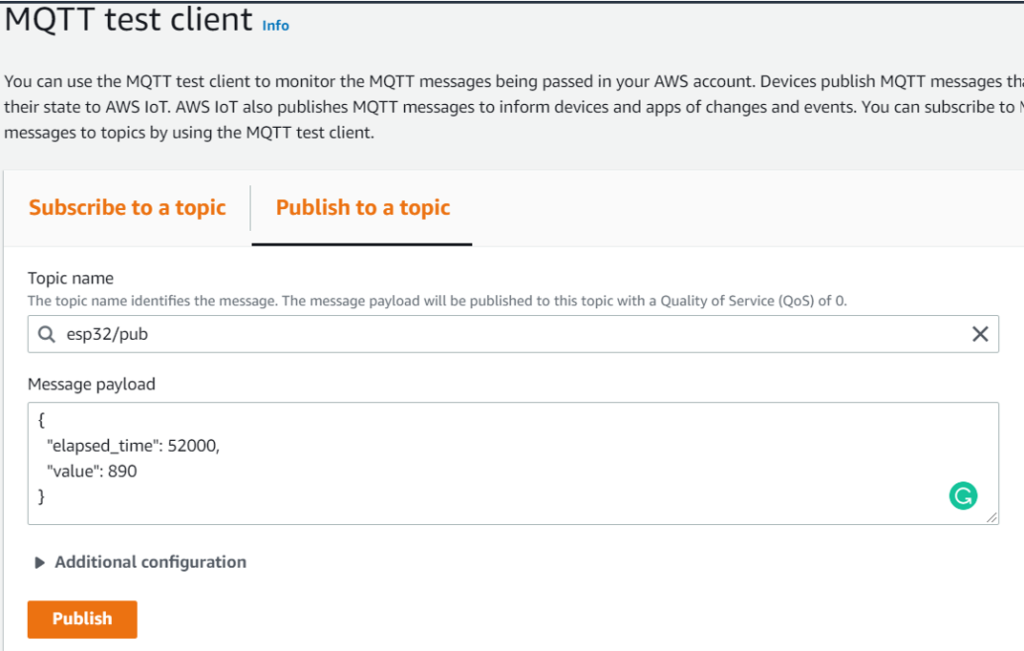
Alternatively, you can click on ‘Test’ from the left menu of AWS IoT Console. This opens the MQTT Test Client. Go to the ‘Publish to a topic’ tab. Enter ‘esp32/pub’ (or whichever topic you have defined the rule on) as the topic name, and for the payload, enter
{
  "elapsed_time": 52000,
  "value": 890
}
Click on ‘Publish’.
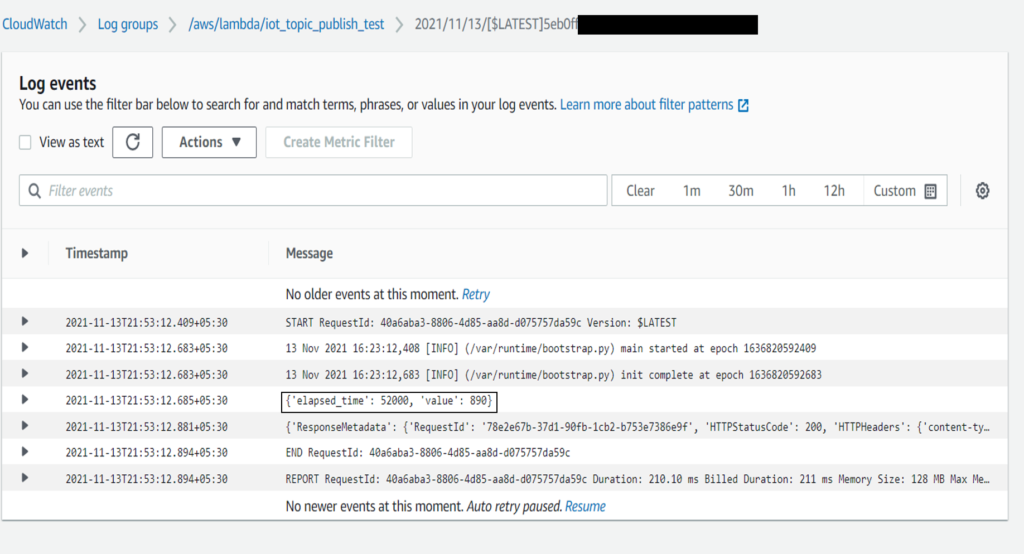
In a separate browser tab, open the lambda console and navigate to the function you have configured the rule on (iot_topic_publish_test in my case). Go to the Monitor Tab, and click on ‘View Logs in CloudWatch’. You should see a log corresponding to the time when you hit ‘Publish’. If you’ve printed the event in the lambda, you’ll see the exact same message in the log.
Next, reduce the magnitude of the value, and click on ‘Publish’ again. This time, the lambda won’t get triggered. That’s it. Your rule works!
I hope you liked this article. For more tutorials on AWS, check out https://iotespresso.com/category/aws/. Also, if you are planning to become a certified AWS Solutions Architect, I’d recommend that you check out this course on Udemy. I took this course and found the lectures to be lucid, to-the-point, and fun. I hope they will help you as well.
3 comments