Introduction
Quite often, when you have several IoT devices deployed in the field, you may want to give your technical support team a nice looking form to make changes to the device settings as and when required. Jotforms are a very good option here. The response from the Jotform can be linked to a variety of services, Azure functions being one of them. The Azure function can then contain the logic to parse and handle that response (make changes in the DB, send SMSes to the devices, etc.). In this tutorial, we will see how to link a Jotform to an Azure function.
Prerequisites
This tutorial assumes that you have an Azure subscription and are familiar with Azure functions, specifically with HTTP Triggered Azure Functions. It also assumes that you have worked with Jotforms in the past, and are here to just understand how to link the two.
Step 1: Creating the Jotform
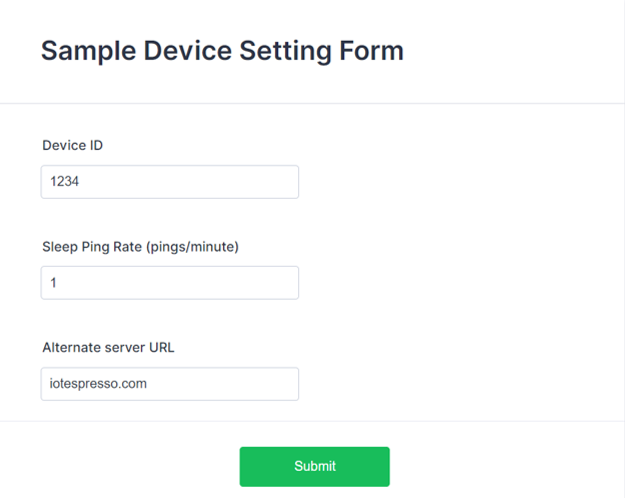
The image below shows the questions in the jotform created by us:
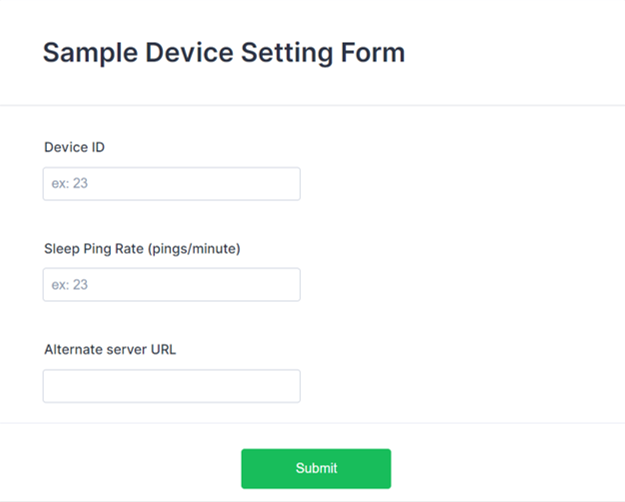
As you can see, there is a numerical field, device ID, which indicates the device for which settings are being changed. There is another numerical field, which corresponds to the first setting: Sleep Ping Rate, indicating how many times in a minute should the device ping to the server in the sleep mode. The second setting is a text field, which is the URL of the alternate server to which the device should ping, in case the main server goes down.
Step 2: Creating the Azure Function
We will create an HTTP Triggered Azure function, with Anonymous Access, using the Python runtime. By going through the function and the explanation, you can easily adapt it to other runtimes.
Generally, in the boilerplate function codes, you see a statement like the one below.
req_body = req.get_json()Most of the developers are tempted to use this same statement when linking jotforms with Azure functions. However, jotform data is not received as a JSON. Instead, it is received as form data. Luckily, a small tweak is all we need.
form_data = req.formThat’s it. Now, you can extract fields from form_data just like you extract them from a json. Jotform responses usually contain the rawRequest object, which is a JSON.
raw_request = json.loads(req.form.get('rawRequest'))This will load the raw_request JSON within your code. You can now extract values from this JSON using .get().
Since we are creating this function only for demo purposes, we will just print the values sent by the users. You can add additional functionalities, like adding the values to a DB, and so on.
The complete function code is given below:
import logging
import json

import azure.functions as func


def main(req: func.HttpRequest) -> func.HttpResponse:
    logging.info('Python HTTP trigger function processed a request.')

    try:
        logging.info(req.form)

        form_id = str(req.form.get('formID'))
        form_title = str(req.form.get('formTitle'))
        pretty = str(req.form.get('pretty'))
        raw_request = json.loads(req.form.get('rawRequest'))

        logging.info(form_id)
        logging.info(form_title)
        logging.info(pretty)

        for (key, value) in raw_request.items():
            logging.info(key)
            logging.info(value)
            logging.info(" ")

        return func.HttpResponse(
            str("Response captured and updated"),
            status_code=200
         )

    except:
        logging.info("Some error occurred")
        return func.HttpResponse(
                str("Error in form data"),
                status_code=404
        )
Step 3: Deploying the function
You can deploy the function using your preferred deployment method. I use Azure Functions Extension for Visual Studio Code to deploy my Azure Functions. Make sure that you create an Application Insights resource for this function app, because we are just logging statements in this function, and we will need this resource for seeing the log output from this function.
Once your deployment is complete, note down the URL of your function, either through the Output of your deployment in VS Code,

or by going to Azure Portal, navigating to this function and clicking on ‘Get Function URL’

Step 4: Adding the Webhook to the Jotform
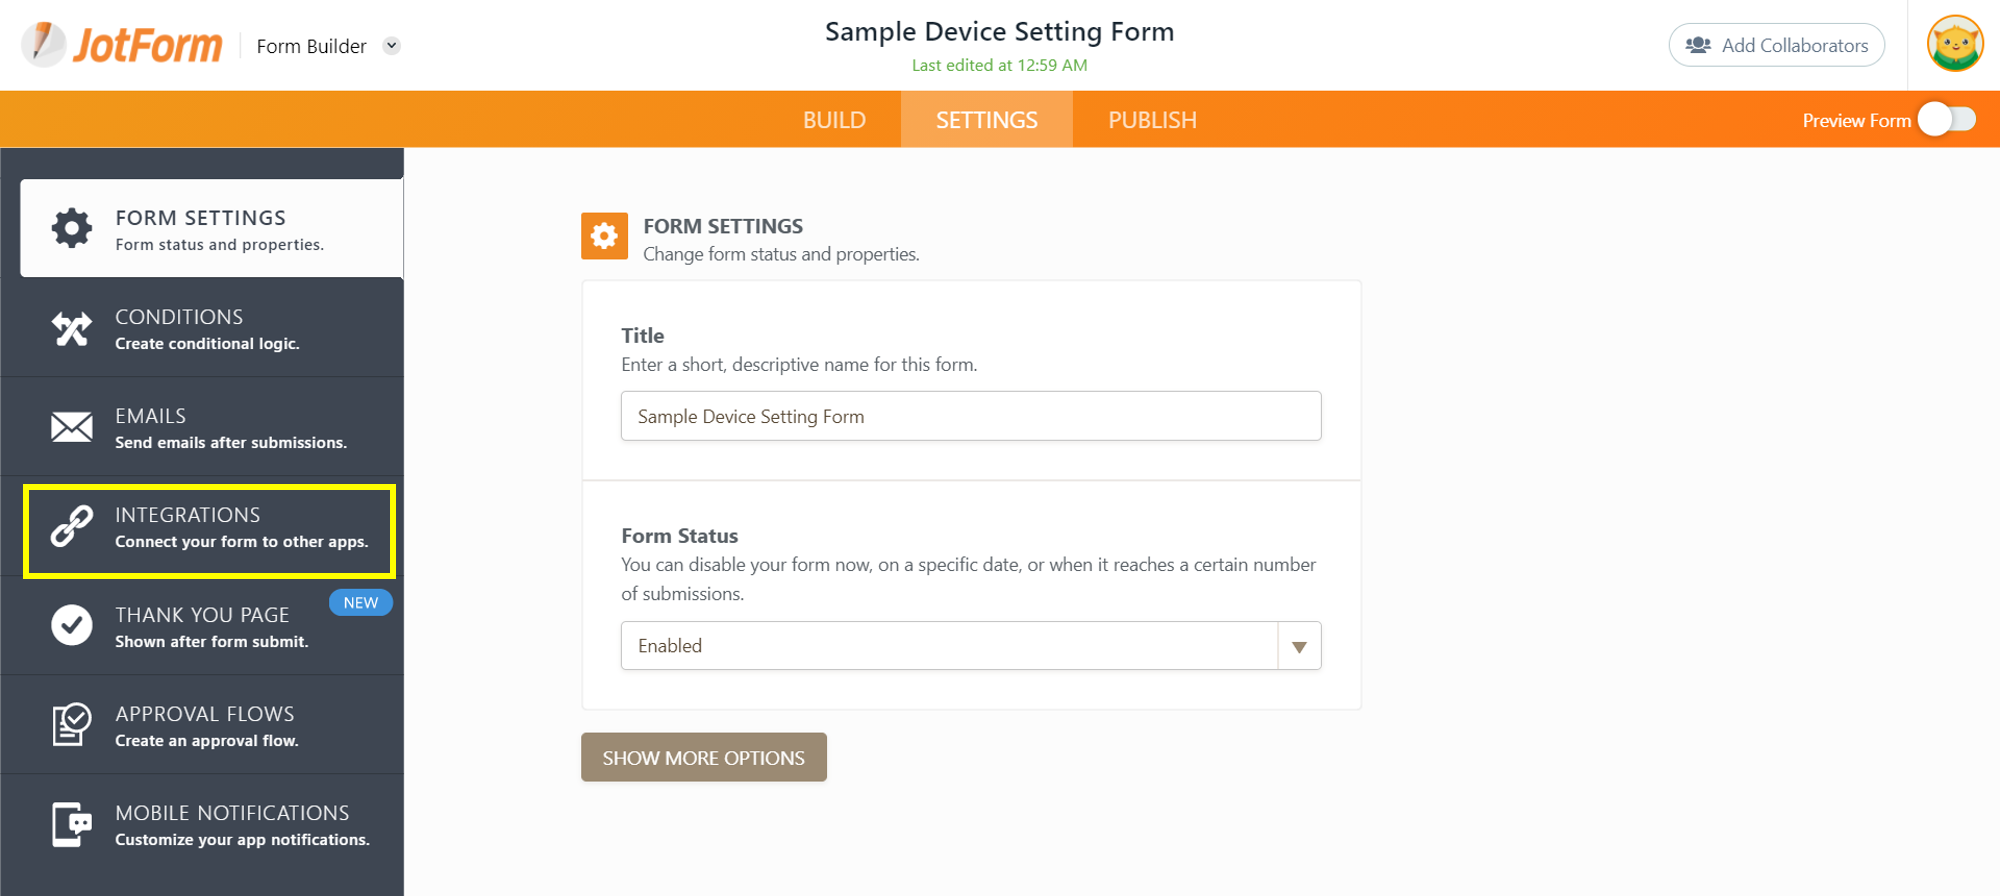
Go to your Jotform, and click on Settings and then click on Integrations.
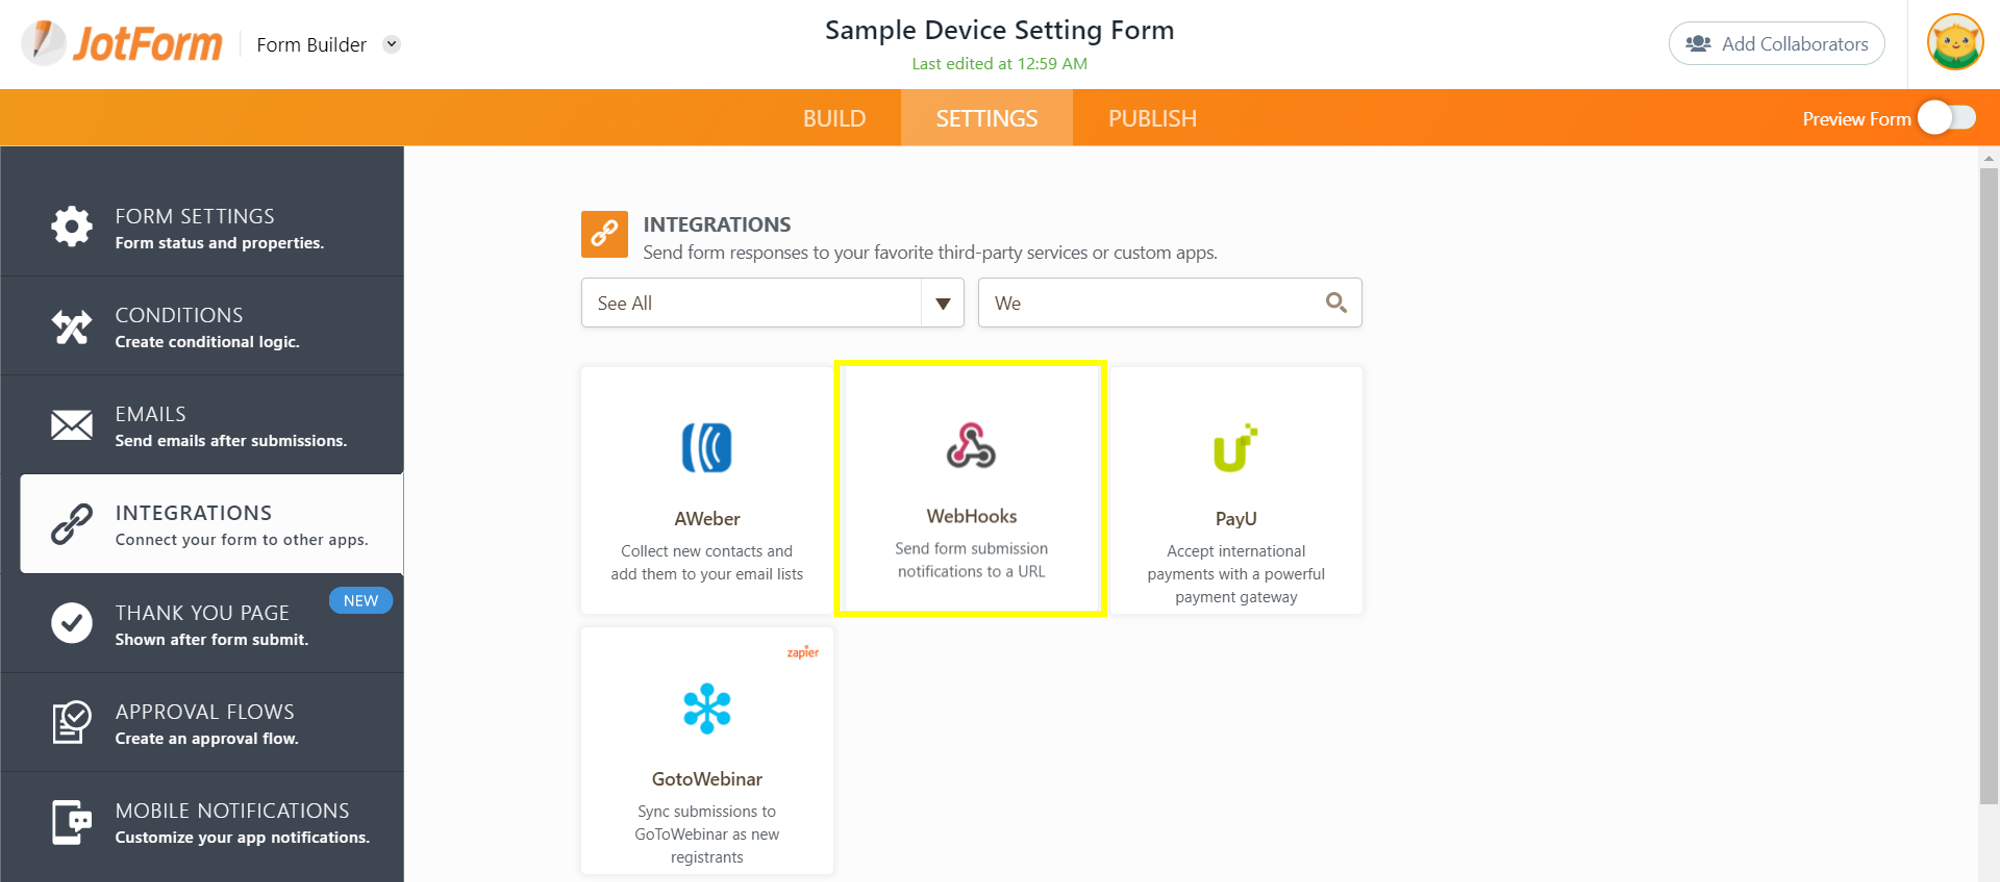
Next, within Integrations, search for WebHooks
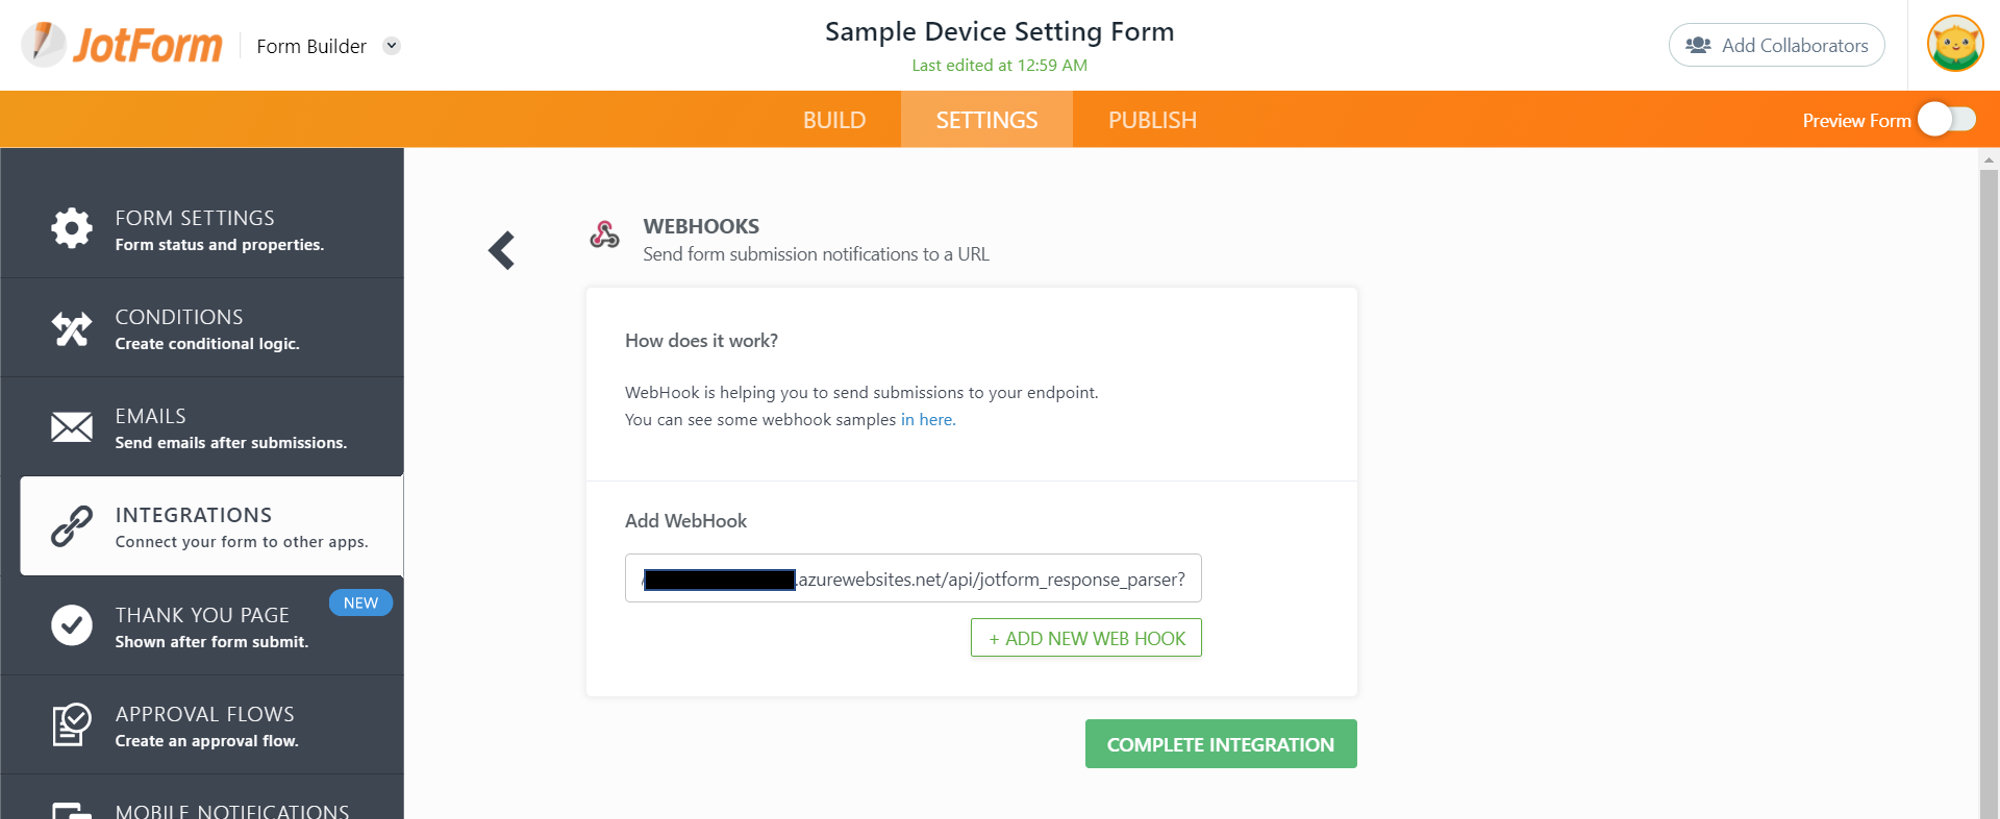
Enter the HTTP Endpoint of the Azure function, that you noted in the previous step, and click on ‘COMPLETE INTEGRATION’.
Now, your Jotform is linked to your Azure function. Every time a response is submitted for the Jotform, the Azure function gets triggered.
Step 5: Testing the Integration
We will fill the Jotform with some dummy entries, and see if the Azure Function gets triggered or not. Before clicking submit, you can open the function in Azure portal in a separate tab, and click on ‘Code + Test’ and open Logs from the bottom ribbon.
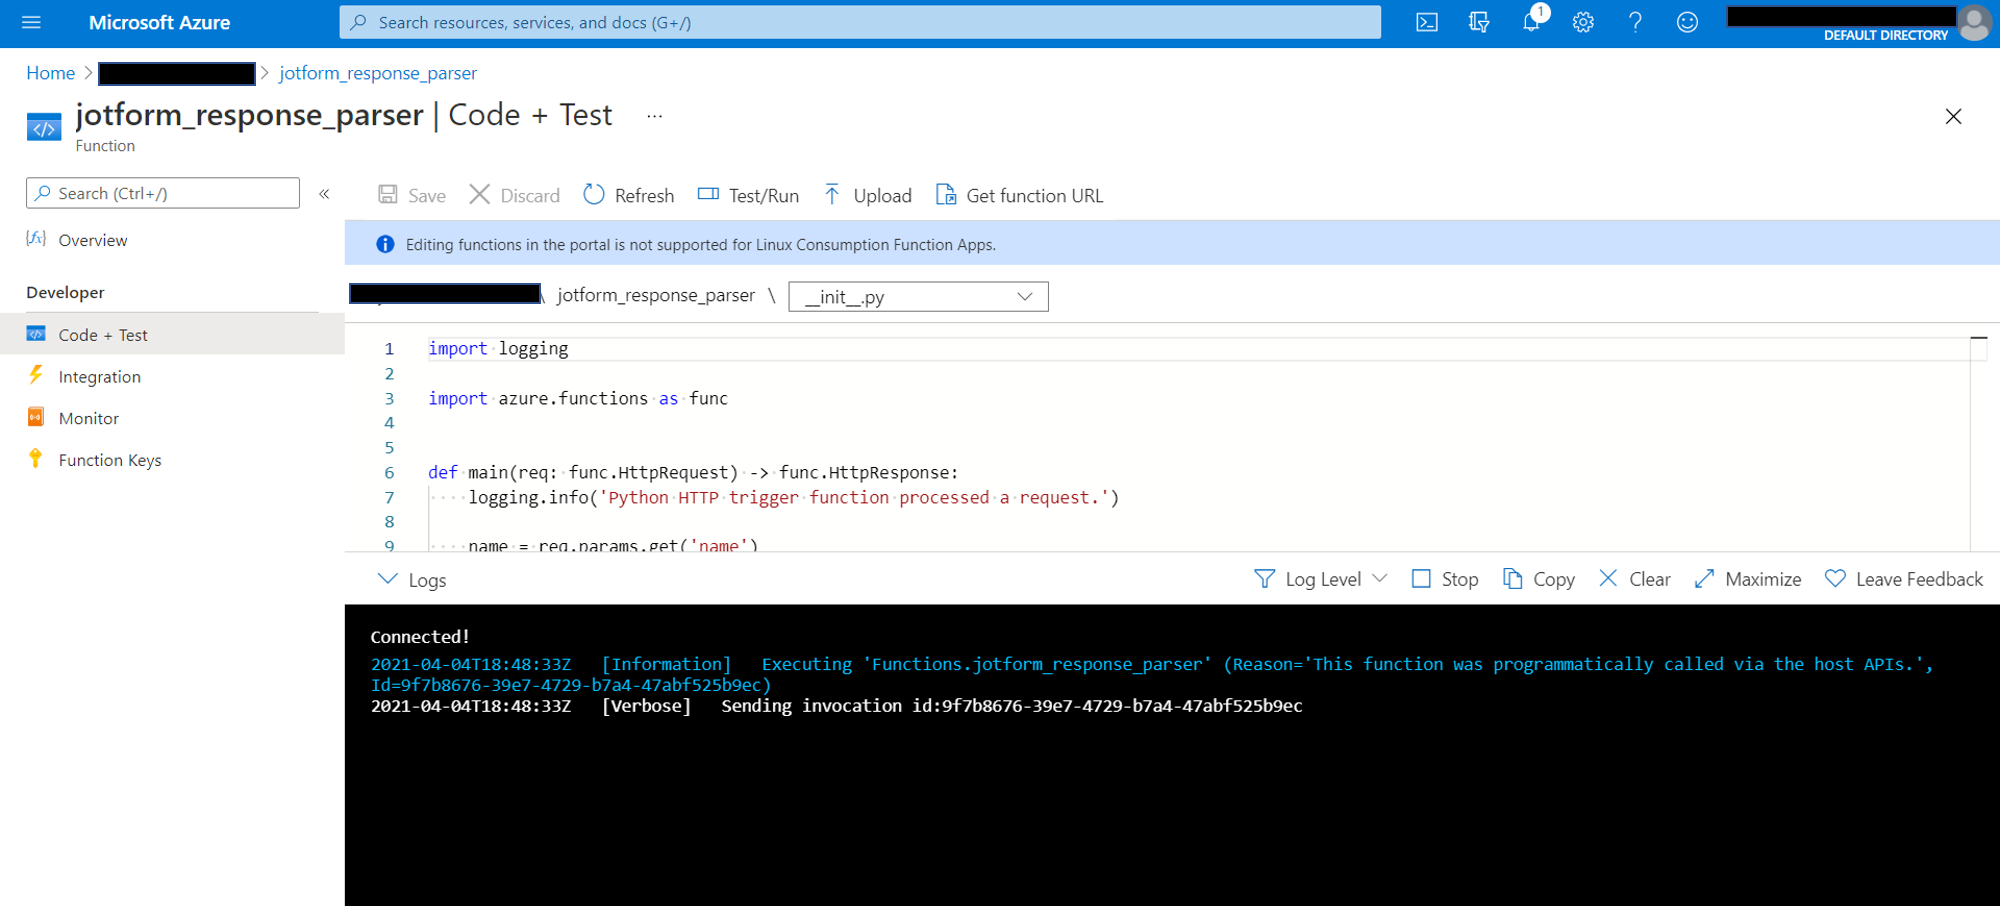
As you can see from the above image, when the Submit button is pressed on the Jotform, the Azure function is invoked.
Now, after a couple of minutes, if you check the Monitoring Tab, you should be able to see a log of the function execution.
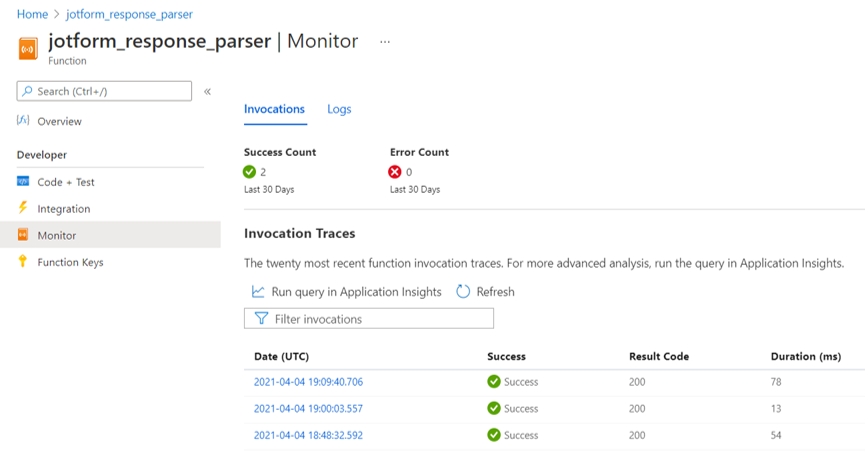
Click on the latest entry, and you will see the fields corresponding to the response you just submitted.
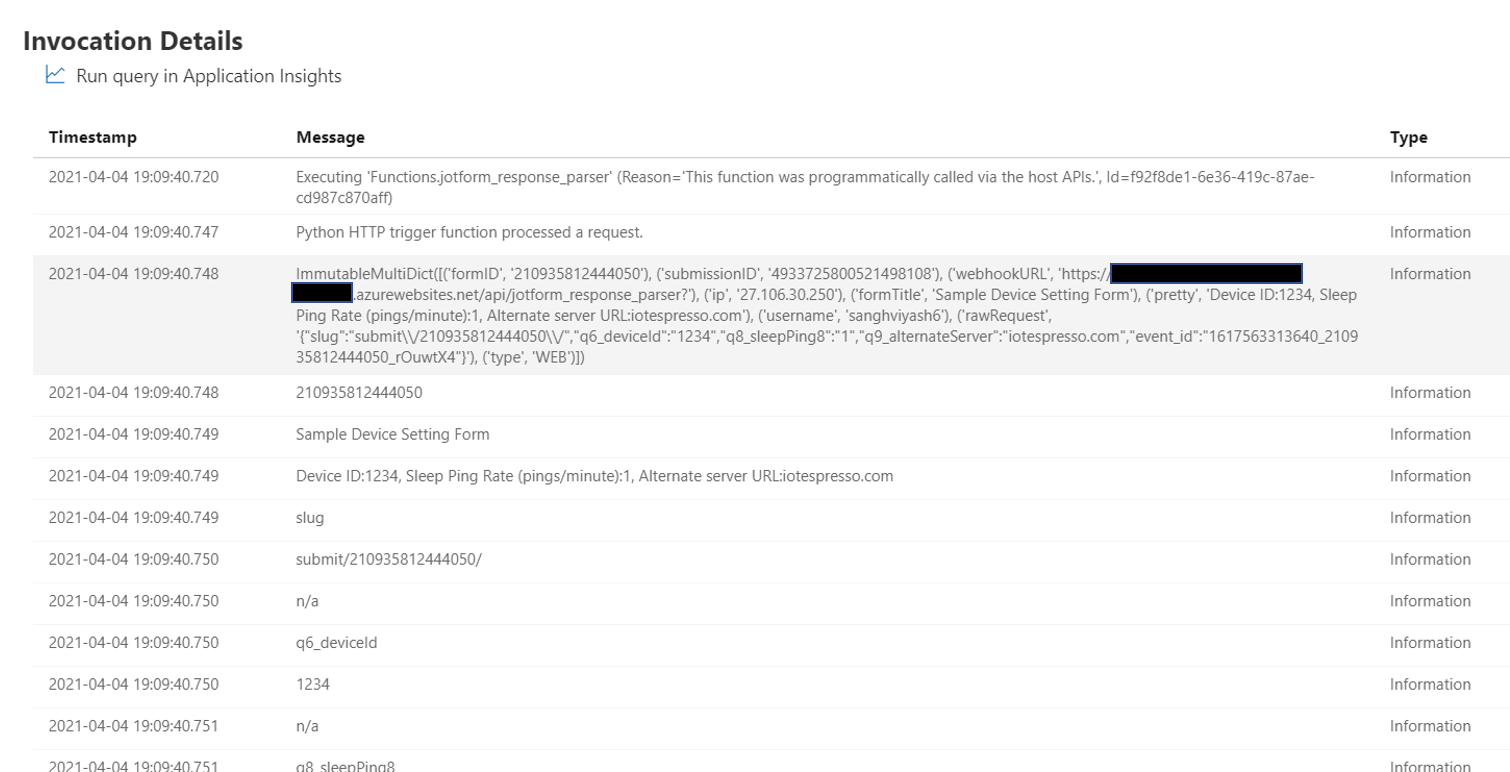
You can see that the formID, formTitle, the pretty request and the keys and values from rawRequest are all printed as expected. It is interesting to see the print output of logging.info(req.form). This is exactly what the jotform sends to the Azure functions. Reproducing it below:
ImmutableMultiDict([(‘formID’, ‘210935812444050’), (‘submissionID’, ‘4933725800521498108’), (‘webhookURL’, ‘https://xxxxxxxxx.azurewebsites.net/api/jotform_response_parser?’), (‘ip’, ‘27.106.30.250’), (‘formTitle’, ‘Sample Device Setting Form’), (‘pretty’, ‘Device ID:1234, Sleep Ping Rate (pings/minute):1, Alternate server URL:iotespresso.com’), (‘username’, ‘sanghviyash6’), (‘rawRequest’, ‘{“slug”:”submit\\/210935812444050\\/”,”q6_deviceId”:”1234″,”q8_sleepPing8″:”1″,”q9_alternateServer”:”iotespresso.com”,”event_id”:”1617563313640_210935812444050_rOuwtX4″}’), (‘type’, ‘WEB’)])
You can now very well understand what all fields are received from the Jotform, and how to parse and process them.
I hope you enjoyed this tutorial. If yes, then you’ll enjoy the other tutorials on this website as well. Checkout https://iotespresso.com/
If you are planning to appear for the Azure Administrator Exam Certification, check out this course on Udemy.
Hello,
Can you please explain how to integrating jotform with sql or mysql database with function app trigger ?
Hi Dinesh,
Within the function app, you can connect to your DB using sqlalchemy. See https://docs.sqlalchemy.org/en/14/dialects/mysql.html. Also, it has already been explained how you can load raw_request in a JSON for extracting content from the form response. You can iterate over this JSON, look for the specific keyword in each key, and extract the value in a relevant variable. Let me know if this answers your query.