In one of the previous posts, we discussed how to set up a Captive Portal using ESP32. In that post, we generated a WiFi field using ESP32. As soon as a device was connected to this field, we used to force open a web page (captive portal) that contained a form. When the users filled the form, we processed the response on ESP32. You are encouraged to go through that tutorial because we will be building on the code used in that tutorial.
Now, we used a hard-coded HTML page in that tutorial. What if we want to dynamically change some elements of the webpage (text of the questions, dropdown options, etc.)? That is exactly the focus of this tutorial.
We do that essentially by using placeholders. Within the html, if you want to add a placeholder, you do that by enclosing it within two % signs. For example %Option1% becomes a placeholder. The HTML we used in the previous tutorial was:
const char index_html[] PROGMEM = R"rawliteral(
<!DOCTYPE HTML><html><head>
  <title>Captive Portal Demo</title>
  <meta name="viewport" content="width=device-width, initial-scale=1">
  </head><body>
  <h3>Captive Portal Demo</h3>
  <br><br>
  <form action="/get">
    <br>
    Name: <input type="text" name="name">
    <br>
    ESP32 Proficiency:
    <select name = "proficiency">
      <option value=Beginner>Beginner</option>
      <option value=Advanced>Advanced</option>
      <option value=Pro>Pro</option>
    </select>
    <input type="submit" value="Submit">
  </form>
</body></html>)rawliteral";
You can see that the second question in the HTML is a dropdown type question, asking the user for ESP32 proficiency. The user can choose one of the 3 options: Beginner, Advanced, Pro.
Now, let us try to make the options variable. In other words, they won’t be hard-coded in the HTML, but will be set in runtime by ESP32.
For that, we follow 3 steps:
Step 1: We first replace the options with placeholders.
Thus, the HTML will now look like:
 <!DOCTYPE HTML><html><head>
  <title>Captive Portal Demo</title>
  <meta name="viewport" content="width=device-width, initial-scale=1">
  </head><body>
  <h3>Captive Portal Demo</h3>
  <br><br>
  <form action="/get">
    <br>
    Name: <input type="text" name="name">
    <br>
    ESP32 Proficiency:
    <select name = "proficiency">
      <option value=%OPTION1%>%OPTION1%</option>
      <option value=%OPTION2%>%OPTION2%</option>
      <option value=%OPTION3%>%OPTION3%</option>
    </select>
    <input type="submit" value="Submit">
  </form>
</body></html>)rawliteral";
Step 2: We declare the values of the options and define a processor function, which replaces the placeholder text with actual values in realtime
String dropdown_option1 = "Level1";
String dropdown_option2 = "Level2";
String dropdown_option3 = "Level3";
String processor(const String& var){
  //Serial.println(var);
  if(var == "OPTION1"){
    return dropdown_option1;
  }
  else if(var == "OPTION2"){
    return dropdown_option2;
  }
  else if(var == "OPTION3"){
    return dropdown_option3;
  }
}
Step 3: We add the processor argument in request->send and request->send_P
Thus, within the CaptiveRequestHandler class,
void handleRequest(AsyncWebServerRequest *request) {
    request->send_P(200, "text/html", index_html, processor);
  }
And within setupServer(),
server.on("/", HTTP_GET, [](AsyncWebServerRequest *request){
      request->send_P(200, "text/html", index_html, processor);
      Serial.println("Client Connected");
  });
The complete code can be found here: https://github.com/yash-sanghvi/ESP32/blob/master/Captive_Portal_With_Processor/Captive_Portal_With_Processor.ino
Once you upload this code to your ESP32, and connect a device to ESP32’s WiFi, you will see the following Web Page as the captive portal.
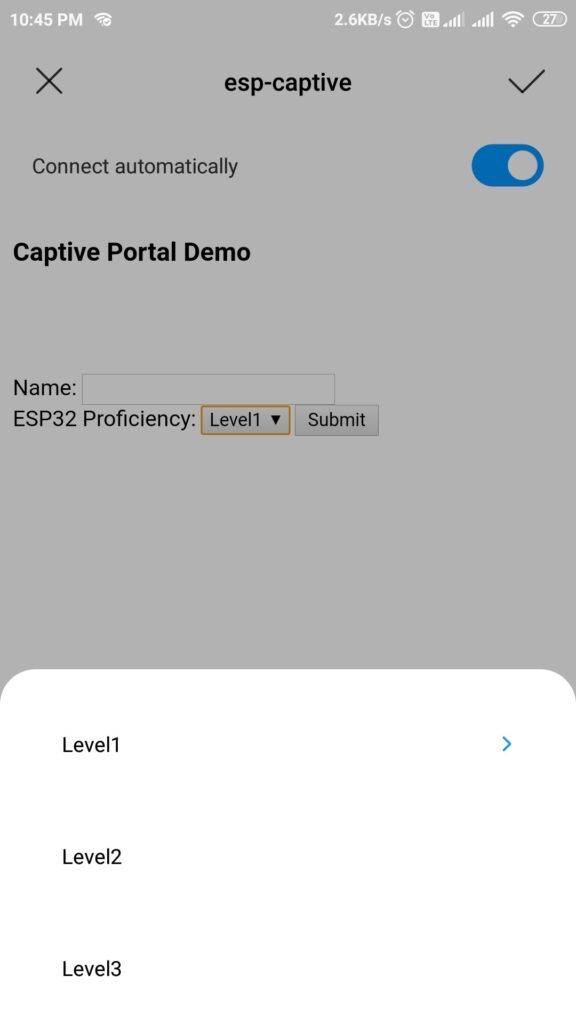
I hope you enjoyed this tutorial. You can further checkout ESP32 Captive Portal – Fetching HTML from SPIFFS to know how to store the HTML file in SPIFFS storage, and fetch it for display in the captive portal.
Hi Yash Sanghvi,
Nice coding, but I am still below beginner. Anyway do you have a script for ESP8266 about the similar subject “Captive Portal”, but I would like to know the code that makes us to upload onto SIFF and the selected captive portal can used shown or ran for user when they access the IP, so Captive portal can easily changed. Much appreciated your help from Indonesia. Wisnu
Hi Wisnu,
There is an equivalent ESP8266 Sketch Data Upload tool, and ESPAsyncWebServer and ESPAsyncTCP libraries work for ESP8266 as well. This tutorial should help you: https://randomnerdtutorials.com/esp8266-web-server-spiffs-nodemcu/
The captive portal does not work with ios…
When I remove the processing part, then it works.
Any ideas
Hi Tobi,
Can you confirm if the issue is iOS specific or browser specific? Can you try on Chrome or some other browser on your iOS device?
I have the same issue. the captive page does not pop up when connecting to the WIFI network but instead now gives the message “no internet connection. when leaving the processor string it pops up again but of coarse then the “%option%” is displayed in the drop down iso level1.
newby here so no idea what’s the problem.
Hi,
Which browser did you use?