Say you have an elastic beanstalk app with the standard URL (http://<app_name>.<region>.elasticbeanstalk.com). Suppose you want a custom URL to point to this app, and also enable TLS/SSL encryption. Thus, finally, something like https://your_custom_domain_or_subdomain.com should point to the app. How do you do it? There are parts to solving this problem:
- Creating a custom domain/subdomain in Route 53
- Requesting a certificate for that domain/subdomain using Amazon Certificates Manager
- Enabling the new domain and HTTPS on your Elastic Beanstalk instance
Let’s go through the steps. First head over to Route53
Creating a custom domain/subdomain in Route53
Registering a new domain
If you don’t already have a new domain, you can register or add a new one by following the steps here. The domain should look like example.com (no http://, no www; there can be other extensions apart from .com, like .net or .in).
Creating a subdomain
Assuming you already have a domain (say mycompany.com) and want the elastic beanstalk environment to point to a separate subdomain (say server.mycompany.com), then you can follow the steps below:
- Head over to Route53 and click on ‘Hosted Zones’
- Click on ‘Create hosted zone’
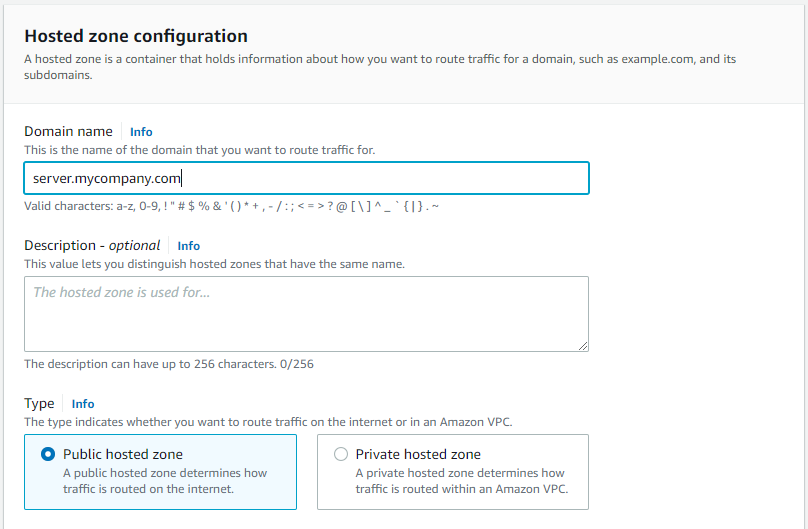
- Give the hosted zone a name, like server.mycompany.com. Enter an optional description.
- For Type, select ‘Public hosted zone’, and then click on ‘Create hosted zone’
Now, click on the hosted zone you just created, and expand the ‘Hosted zone details’ tab. You will find 4 entries under ‘Name servers’. Copy those.
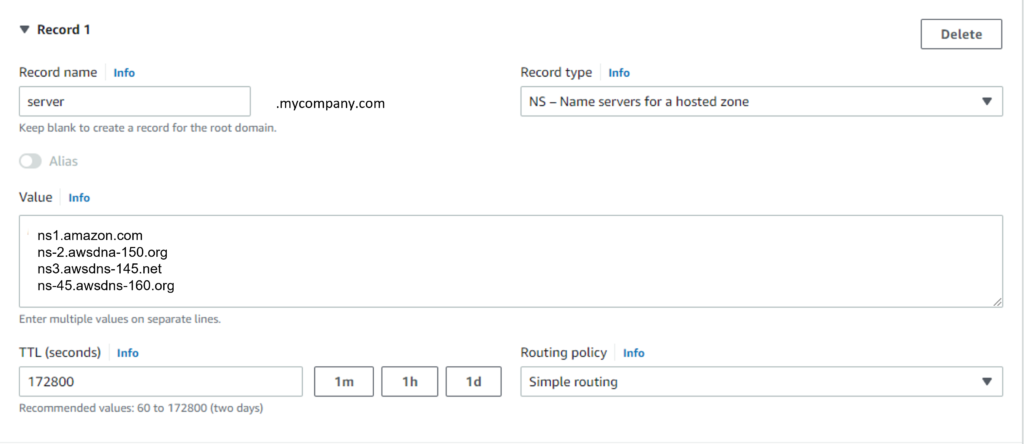
Now, go back to the hosted zone of your root domain (mycompany.com), and click on ‘Create record’. For the record name, enter the subdomain prefix (‘server’ for this example), for the record type, select ‘NS’. In the value field, enter the 4 name servers you copied in the previous step. TTL can be set to a higher value (like 172800 seconds), and for routing policy, select ‘Simple routing’.
Click on ‘Create records’. Your subdomain is now created and active.
Requesting a certificate for that domain/subdomain using Amazon Certificates Manager
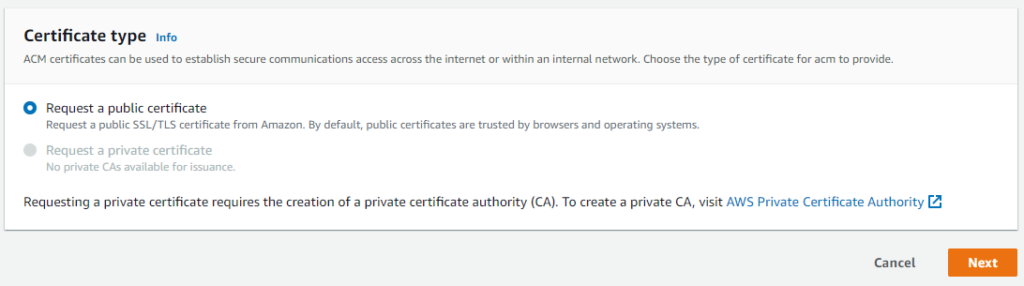
Now, search for Certificate Manager in the AWS Console. Click on ‘Request’ and on the next screen, click on ‘Request a public certificate’.
For the fully qualified domain name, enter the domain or subdomain for which you are requesting the certificate. In this example, it will be server.mycompany.com. For the validation method, select ‘DNS validation’ and then click on ‘Request’.
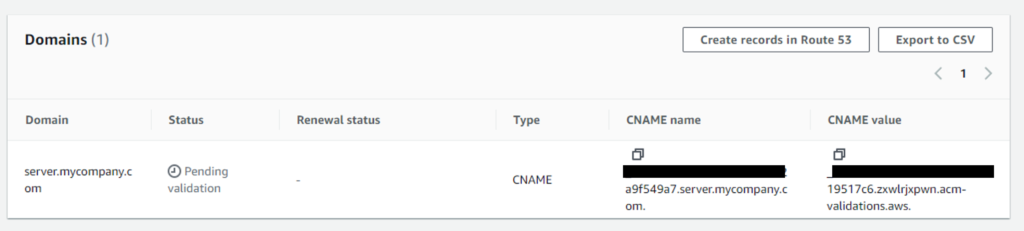
Now, you should be able to see the certificate in the list of certificates on ACM, with the status as ‘Pending validation’. Click on the certificate.

Within the ‘Domains’ section, click on ‘Create records in Route53’. This will create CNAME records in Route 53 and the certification validation will be completed.
Enabling the new domain and HTTPS on your Elastic Beanstalk instance
Adding the domain to the Elastic Beanstalk environment
Now, go to your Elastic Beanstalk environment. Click on ‘Configuration’ from the left pane and edit the Load Balancer settings. Within listeners, click on ‘Add Listener’. For the port, enter 443 (the port for HTTPS), for the protocol, select HTTPS. Select the certificate that you just created in the Certificate Manager from the ‘SSL certificate’ dropdown. For the ‘SSL Policy’, select ELBSecurityPolicy-2016-08. The default process can be left as ‘default’ unless you have some other processes defined. Click on ‘Add’.
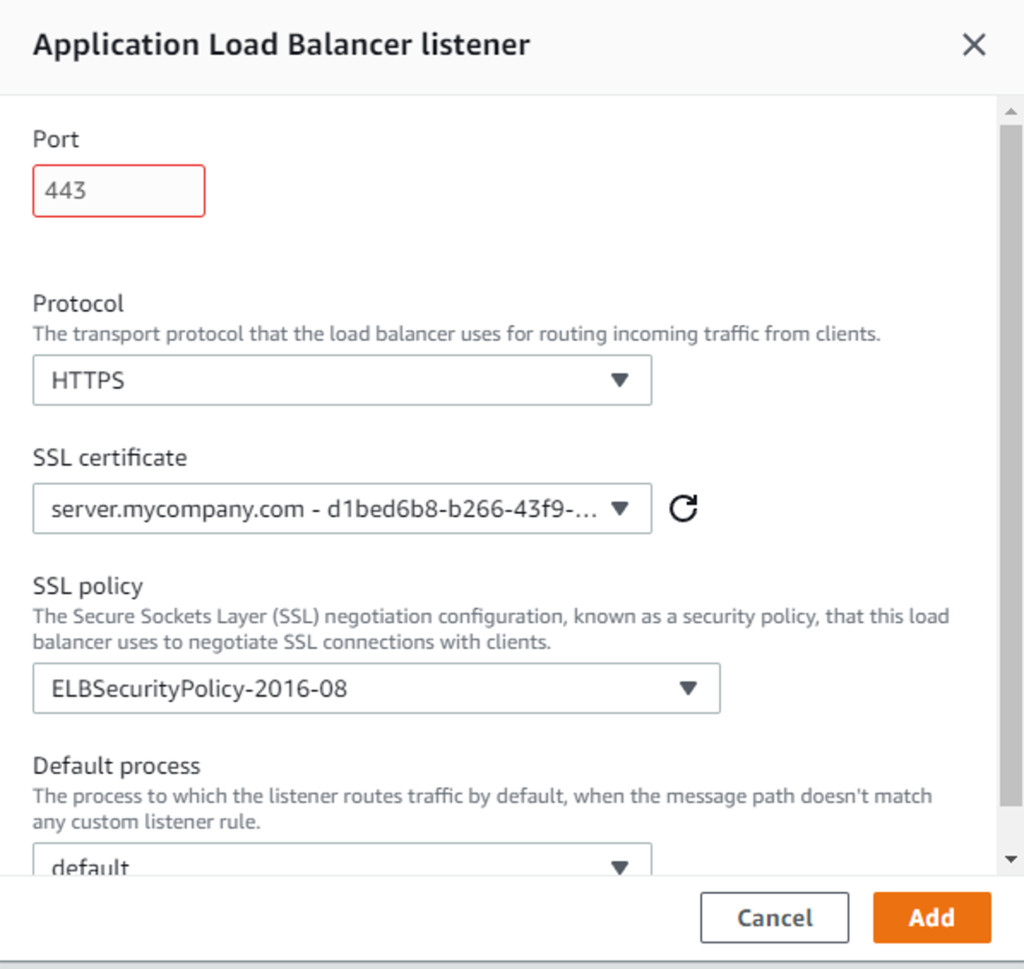
Then click on ‘Apply’ at the bottom of the Application Load Balancer settings.
This will add the domain to the elastic beanstalk environment.
Creating an Alias Record in Route53
Now, one final step remains: Creating the Alias record in Route53. Note that the Alias record is for elastic beanstalk environments that have the region specified in the existing URL. All environments created after early 2016 have the region specified in the existing URL. If your environment was created before 2016, it will not have the region name in the existing environment URL. In that case, you will need to use the CNAME record instead of the ALIAS (A) record. See the steps here.
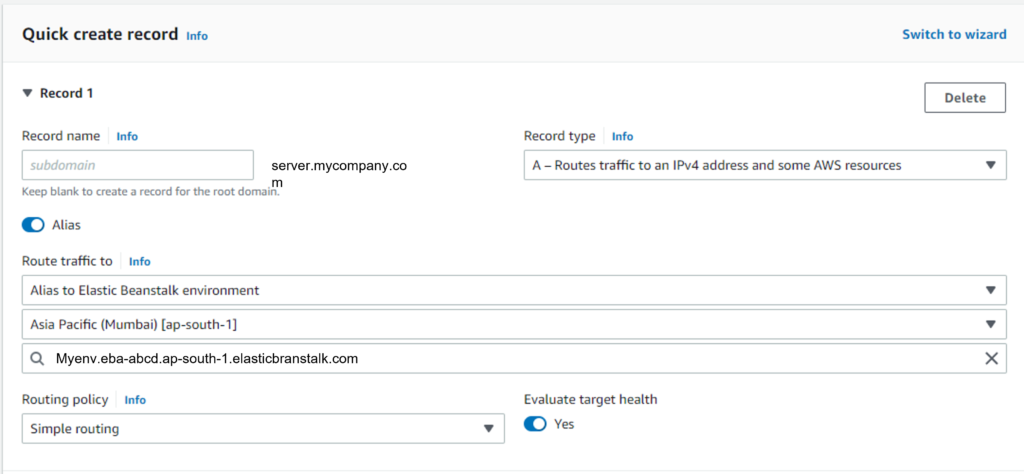
For creating the Alias record, head over to Route53 and select the hosted zone of your subdomain. Click on ‘Create record’. Keep the record name text field blank, and select the record type as ‘A’. Check the ‘Alias’ slider. In the ‘Route traffic to’ section, select ‘Alias to Elastic Beanstalk environment’, then select the region and the environment you want to route the traffic to. Select the routing policy as ‘Simple routing’, and you can leave the ‘Evaluate target health’ option as ‘Yes’. Click on ‘Create records’.
That’s it. Now, https://server.mycompany.com points to the elastic beanstalk environment. Go ahead and use it for your APIs or for your frontend.
I hope you liked this article. For more tutorials on AWS, check out https://iotespresso.com/category/aws/. Also, if you are planning to become a certified AWS Solutions Architect, I’d recommend that you check out this course on Udemy. I took this course and found the lectures to be lucid, to-the-point, and fun. I hope they will help you as well.