
Tags can be a great way to keep track of your cost distribution. AWS Cost Explorer lets you group costs by tags to help you visualize which category of components are contributing the maximum to your bill.
An example is given below:
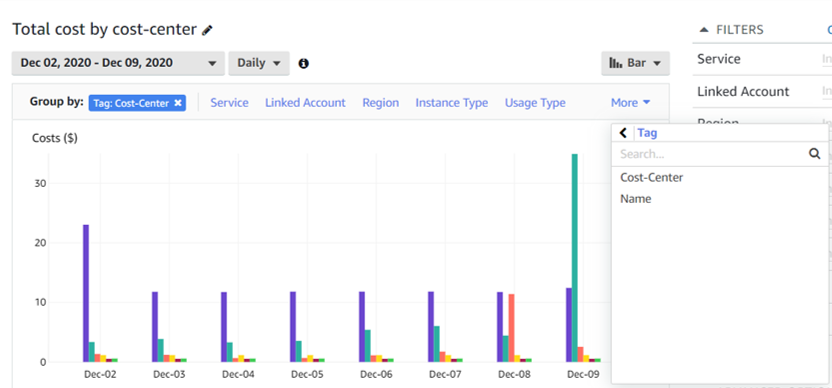
As you can see from the above image, based on the custom Cost-Center tags assigned to all the resources, the value corresponding to the blue bar is the highest cost contributor regularly, whereas the one corresponding the the green bar shows a sudden spike on 9th December. Such insights can be very useful when trying to determine your cost reduction strategy.
In this tutorial, we will see how to assign tags like the one above to the lambda services deployed using the serverless framework.
For that you will first need to install a serverless plugin: Serverless Plugin Resource Tagging. It can be installed using the following npm command:
npm install serverless-plugin-resource-taggingOnce that is installed, you only need to make two changes to your serverless.yml file.
Add the plugin under the plugins section
For instance, if you also have the serverless-python-requirements plugin, your plugins section would look like:
plugins:
  - serverless-python-requirements
  - serverless-plugin-resource-tagging
Add stackTags in your provider:
provider:
  name: aws
  runtime: python3.6
  lambdaHashingVersion: 20201221
  region: us-west-2
  stackTags:
    Cost-Center: "myCostCenter"
Once these changes have been done, a minimal serverless.yml file should look like the following:
service: my-service

provider:
  name: aws
  runtime: python3.6
  lambdaHashingVersion: 20201221
  region: us-west-2
  stackTags:
    Cost-Center: "myCostCenter"

functions:
  hello:
    handler: handler.hello
    layers:
      - {Ref: PythonRequirementsLambdaLayer}

plugins:
  - serverless-python-requirements
  - serverless-plugin-resource-tagging
custom:
  pythonRequirements:
    dockerizePip: true
    layer: true
You can deploy this service and then verify in the lambda console that the tags have been added to all the functions within the service. Go to any function within the service, open the Configuration tab and click on Tags.
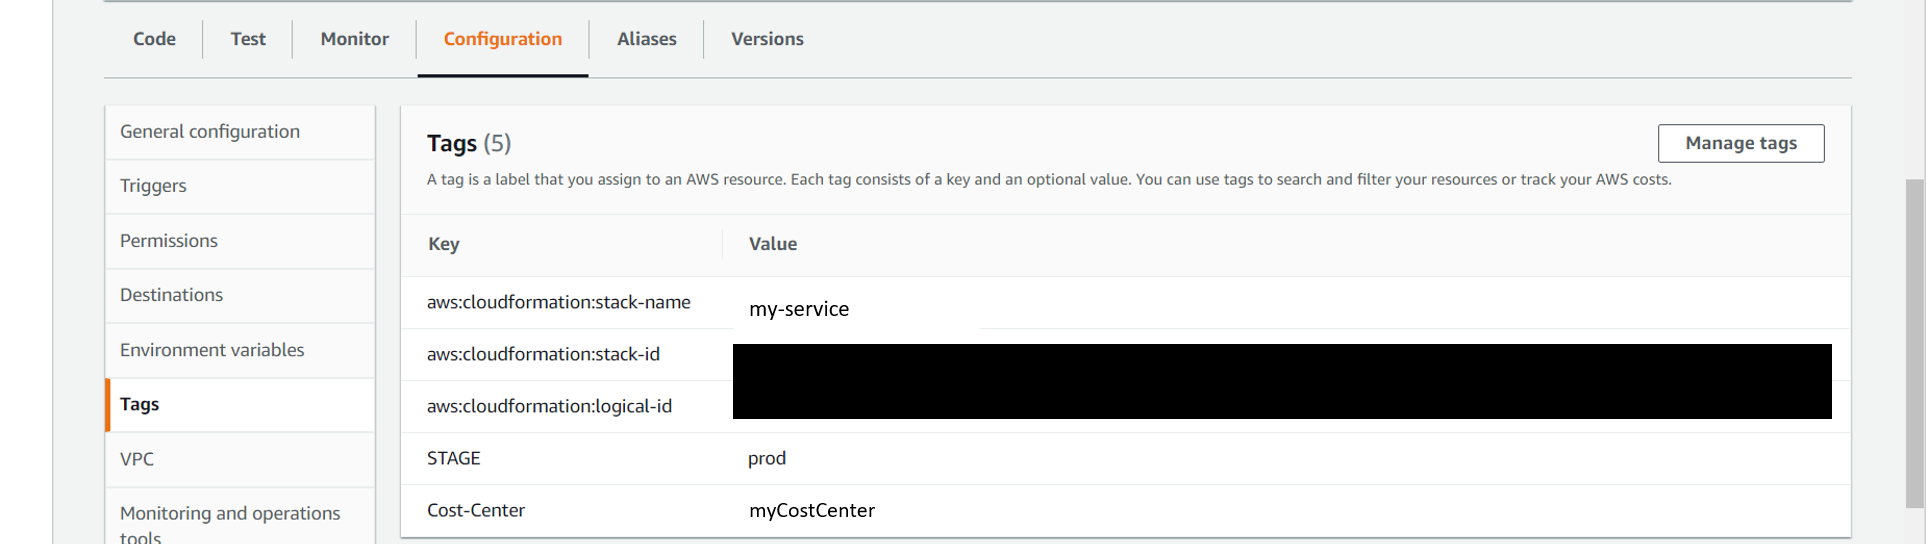
As you can see, the tag has been added. You can also add multiple tags one below the other under stackTags.
provider:
    name: aws
    runtime: python3.6
    lambdaHashingVersion: 20201221
    region: us-west-2
    stackTags:
        Tag1: "myTag1"
        Tag2: "myTag2"
I hope you found this tutorial helpful. You can check out more tutorials on AWS here.
Also, if you are planning to become a certified AWS Solutions Architect, I’d recommend that you check out this course on Udemy. I took this course and found the lectures to be lucid, to-the-point, and fun.