
JSON Web Tokens or JWTs have become very popular in recent times. If you go to the JWT website, you are greeted with the following text:
JSON Web Tokens are an open, industry standard RFC 7519 method for representing claims securely between two parties.
Now, if you are anyone like me, the above statement would have made no sense whatsoever. So what are JWTs? And what’s the fuss about? Let’s try to decode all of that in layperson terms. Please note that I may be simplifying a lot of things in this tutorial. If I have oversimplified anything, or if some concepts need more nuanced explanations, then please post the same in the comments.
What are JWTs?
JWTs are, considering the most common application, authorization tokens. If I am a web portal that you can log in to, I will return a JWT to you in the response to your successful login request. In each subsequent request, you send that JWT back to me. If I receive that JWT, I will know that the request is coming in from a known source, and I’ll accept and process that request. If you don’t share that JWT in your request, I don’t know who you are and your request will be rejected.
JWTs ensure that your protected resources cannot be accessed by anyone in general. For example, if you have a ‘My Profile’ page in your website, you only want the logged-in people to be able to access that page. With JWTs, this becomes easy to implement.
So basically, the security of the login service is essentially being used to make the other requests secure. If you logged in using the correct ID and password, only then you will get back a JWT. And if you attach that JWT while making any request, I know that you logged in some time back, and thus, are authorized to access protected resources.
Of course, there are other applications of JWTs apart from authorization, but let’s discuss them in another post. Authorization is anyway the most common application of JWT.
What do JWTs look like?
They look like the token below:
eyJhbGciOiJIUzI1NiIsInR5cCI6IkpXVCJ9.eyJzdWIiOiIxMjM0NTY3ODkwIiwibmFtZSI6IkpvaG4gRG9lIiwiaWF0IjoxNTE2MjM5MDIyfQ.SflKxwRJSMeKKF2QT4fwpMeJf36POk6yJV_adQssw5c
Essentially 3 base64Url strings separated by dots. Just like the base16 or hexadecimal system uses the letters A to F in addition to the 10 digits, base64 uses the 10 numerical digits, lower case a to z, upper case A to Z, and two non-alphanumeric characters, which are usually + and /. However, these non-alphanumeric characters are not URL-safe. Therefore, JWT uses base64Url strings instead of base64 strings. Thus, it uses character – instead of +, and _ instead of /, and does not contain the = padding.
What do the three strings represent? The first one represents the header, the second one represents the payload and the last one represents the signature. What are these?
Let’s discuss them one by one.
Header
The header is a JSON that typically contains two keys: the type of the token (JWT), and the algorithm used for signing. For example:
{
  "alg": "HS256",
  "typ": "JWT"
}
This JSON is base64Url encoded and forms the first part of the JWT.
Payload
The payload is also a JSON. In simple words, the payload content is the stuff that helps verify the JWT. The payload is also what determines the size of the JWT. Larger the payload, more is the size of the JWT. If I share a JWT with you whose payload contains
{
  iss: iotespresso.com
}
and in subsequent requests, you share back the same JWT, then on decoding it, I can get an idea that this was issued by me. Of course, there isn’t just one key that the JWT payload contains. It can contain several keys. There are 3 types of keys (referred to as claims): registered, public and private.
Registered claims are like the standard keys (these are also reserved). Common examples are iss (issuer), exp (expiration time), sub (subject), etc. The full list can be found here. Note that it is not necessary to include all the reserved claims. Only use the bare minimum required for your application (lack of verbosity is one of the features of JWTs)
Expiration time is quite important. Have you experienced that on your browser, if you are logged into a website, and come back to it after a long time and try to navigate around, you are asked to login again? Why does this happen? Mostly because the JWT shared with you the first time you logged in got expired.
Public claims are custom claims meant for public consumption. They are not part of registered claims, but meant for global usage. Therefore, they should be defined in the IANA JSON Web Token Registry and care should be taken to ensure that the namespace doesn’t collide with an existing namespace. Some public claims can be found here. Most probably, you won’t be using public claims in your JWTs.
Private claims are custom claims meant for limited usage. If I have a website that interacts only with a limited set of clients, and we agree on using a custom key in our JWTs (say fav-food), it can be a private claim. It need not be collision resistant. Anything that is relevant and important to your application can be passed here.
Please note that you shouldn’t share sensitive content (passwords, PINs, etc.) in JWTs, because the first two parts of JWTs are simply the header and the payload in base64Url format. They can be easily decoded. For example, try entering the first part and second part of the above JWT here.
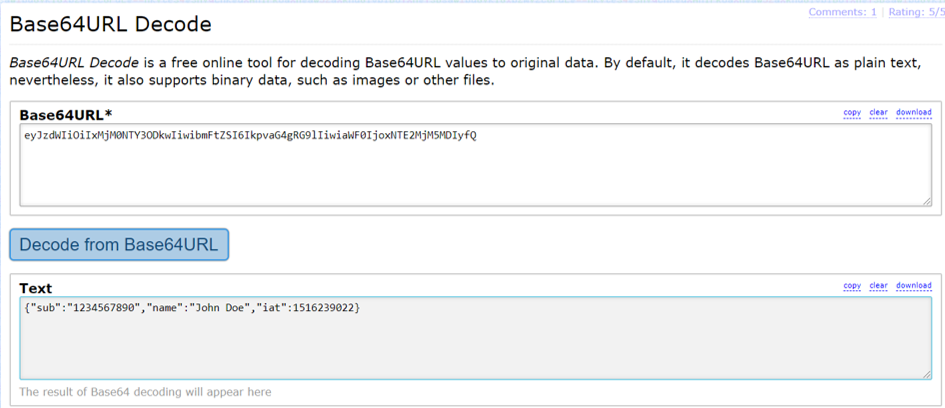
As you can see, you don’t need any secret code to “decrypt” the first and second part of JWTs. It is as simple as converting a hexadecimal number to decimal number.
Signature
In this part, we take the JWT generated so far (base64Url encoded header, followed by a dot, followed by a base64Url encoded payload), and sign it with a secret, using some algorithm (that is specified in the header). Of course, going into the details of the encryption algorithms is beyond the scope of this article, but if you are interested, you can refer to this article here for an overview.
Why is the signature part important? As we discussed earlier, anyone can decode a base64Url encoded string. However, a string encrypted by a secret is very difficult to decrypt. You need the same key that signed it (in case of symmetric encryption), or the private key (in case of asymmetric encryption), and that is not something anyone can guess (what’s the point of encryption otherwise?). Thus, if someone wants to fool the server into believing that they are authorized, and can somehow get access to the header and payload format, they still cannot create the 3rd part of the JWT.
How does the server deal with incoming JWTs?
In any request that a server receive that contains a JWT, the server will essentially perform the following operations, not exactly in order:
- Decode header and payload part
- Decrypt the signature (using the algorithm mentioned in the header, and the available secret)
- Check if the header and the payload in the decrypted signature match the decoded header and payload
- Make other checks, like expiry of the token, user_id, etc. If the received JWT meets all the requirements, go ahead and process the request
In most cases, since you will simply be sending back the same token that you received from the server at the time of login, the server will be able to share all the resources with you, that you have access to. And you will be asked to login again as soon as your JWT expires.
JWT with Python
If you are interested in creating your own JWT server with Python, the pyJWT is a good library to get started with. It is sponsored by OAuth0, and contains all the required functionalities to get your JWT server up and running.
Further Reading
- Validating JWT Tokens from Azure AD in Python: This is an interesting article. It validates the JWT (received from the Azure AD server) on the client side, using pyJWT. It will help clear a lot of concepts.
- Sessionless Authentication with JWTs: I personally found the language of this article to be quite simple and lucid. Read this to further clarify concepts related to JWTs.
- JWT Website
With this, I’ll end this article. If you want me to cover any other aspect related to JWTs, then let me know in the comments.
Found this post helpful? Then check out further posts on iotespresso.com. Also, follow IoT Espresso on Twitter to get notified about every new post.